Data structures
To keep your data tidy and efficiently process it, you need to structure it. The two most common data structures are objects and arrays (also called lists).
In this lesson, we’ll use these structures to store data about a classroom. Buckle up—there are a lot of fundamental concepts here!
Before diving in, let’s set things up.
Make a new folder somewhere on your computer, open it with VS Code, and create two files:
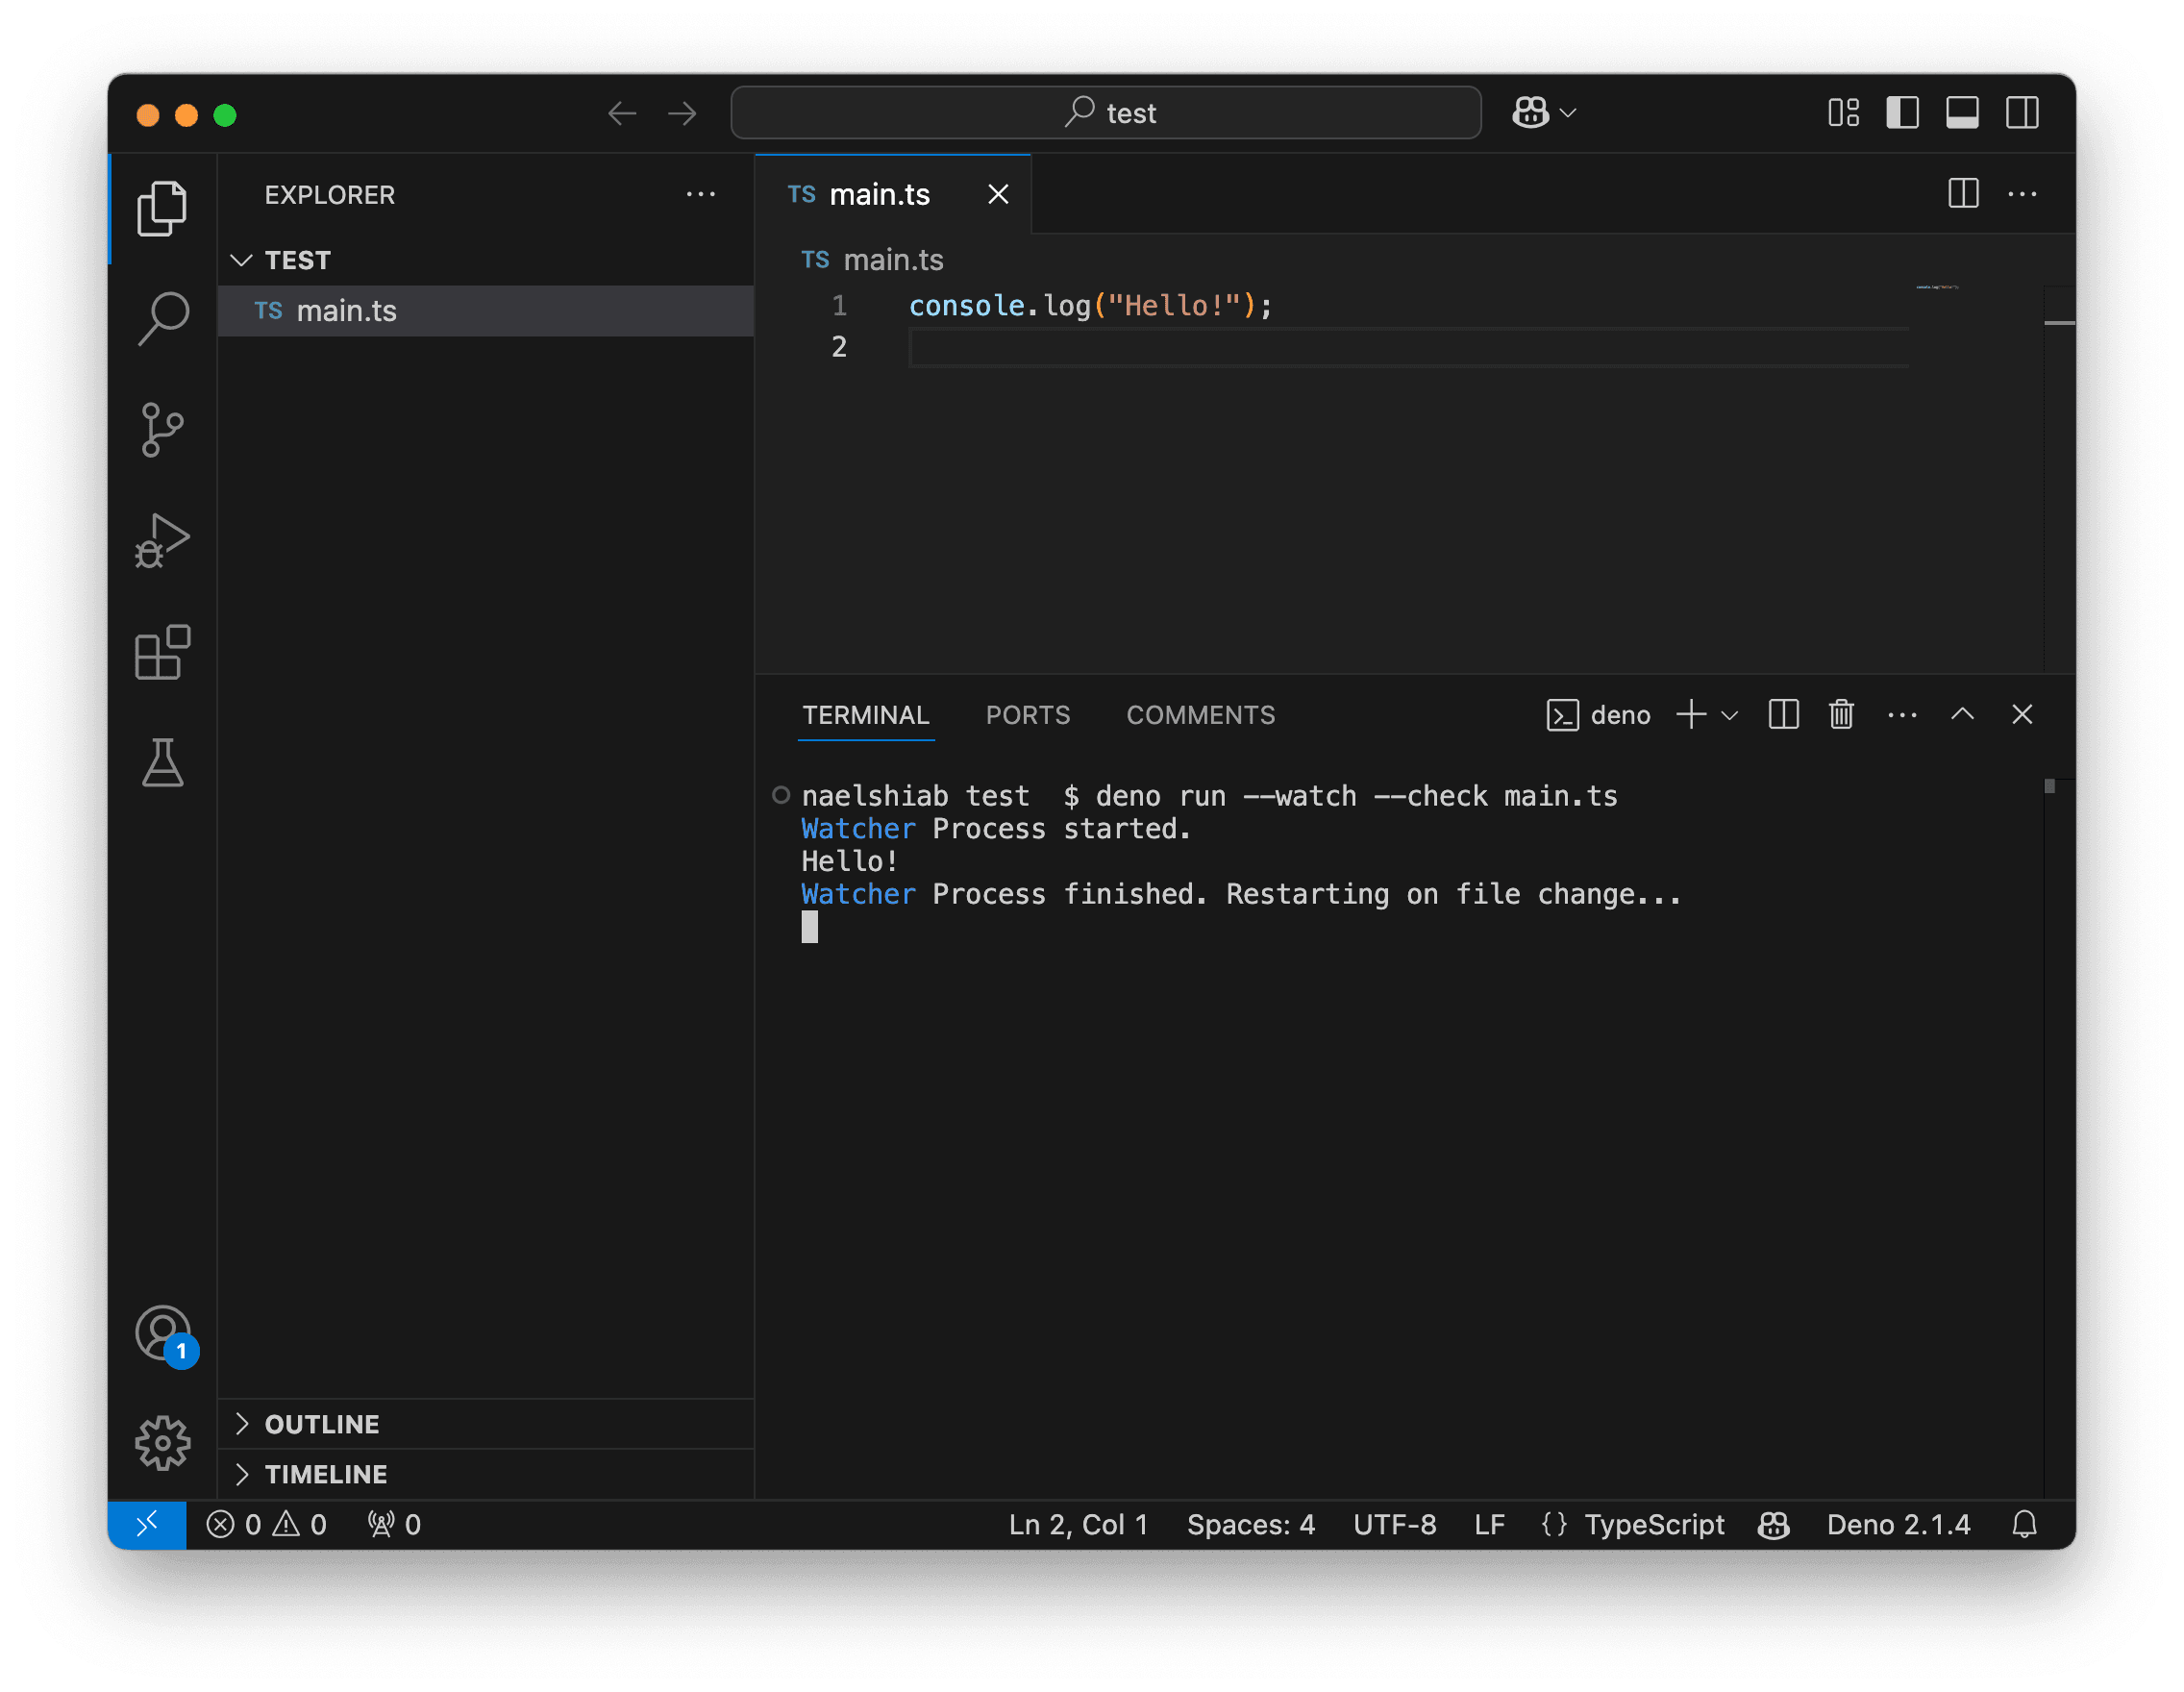
main.ts, where we will write our code. To start, you can addconsole.log("Hello!");to it.deno.json, which lets VS Code know this is a Deno project and enables the Deno extension. You can tweak settings in this file, but we’ll keep it empty for now.
Open the terminal and run the following command:
deno run --watch --check main.ts
This command clears the terminal and reruns main.ts every time you save it (CMD + S on Mac or CTRL + S on PC).
You can use this setup to test the code provided in this lesson. (Yes, I forgot to include the deno.json file before taking all the screenshots for this lesson. Learn from my mistake and do better! 🥲)
Objects
Objects store data as key-value pairs enclosed in curly brackets ({}), with each pair separated by a comma. The keys are plain identifiers, and the values can be any data type.
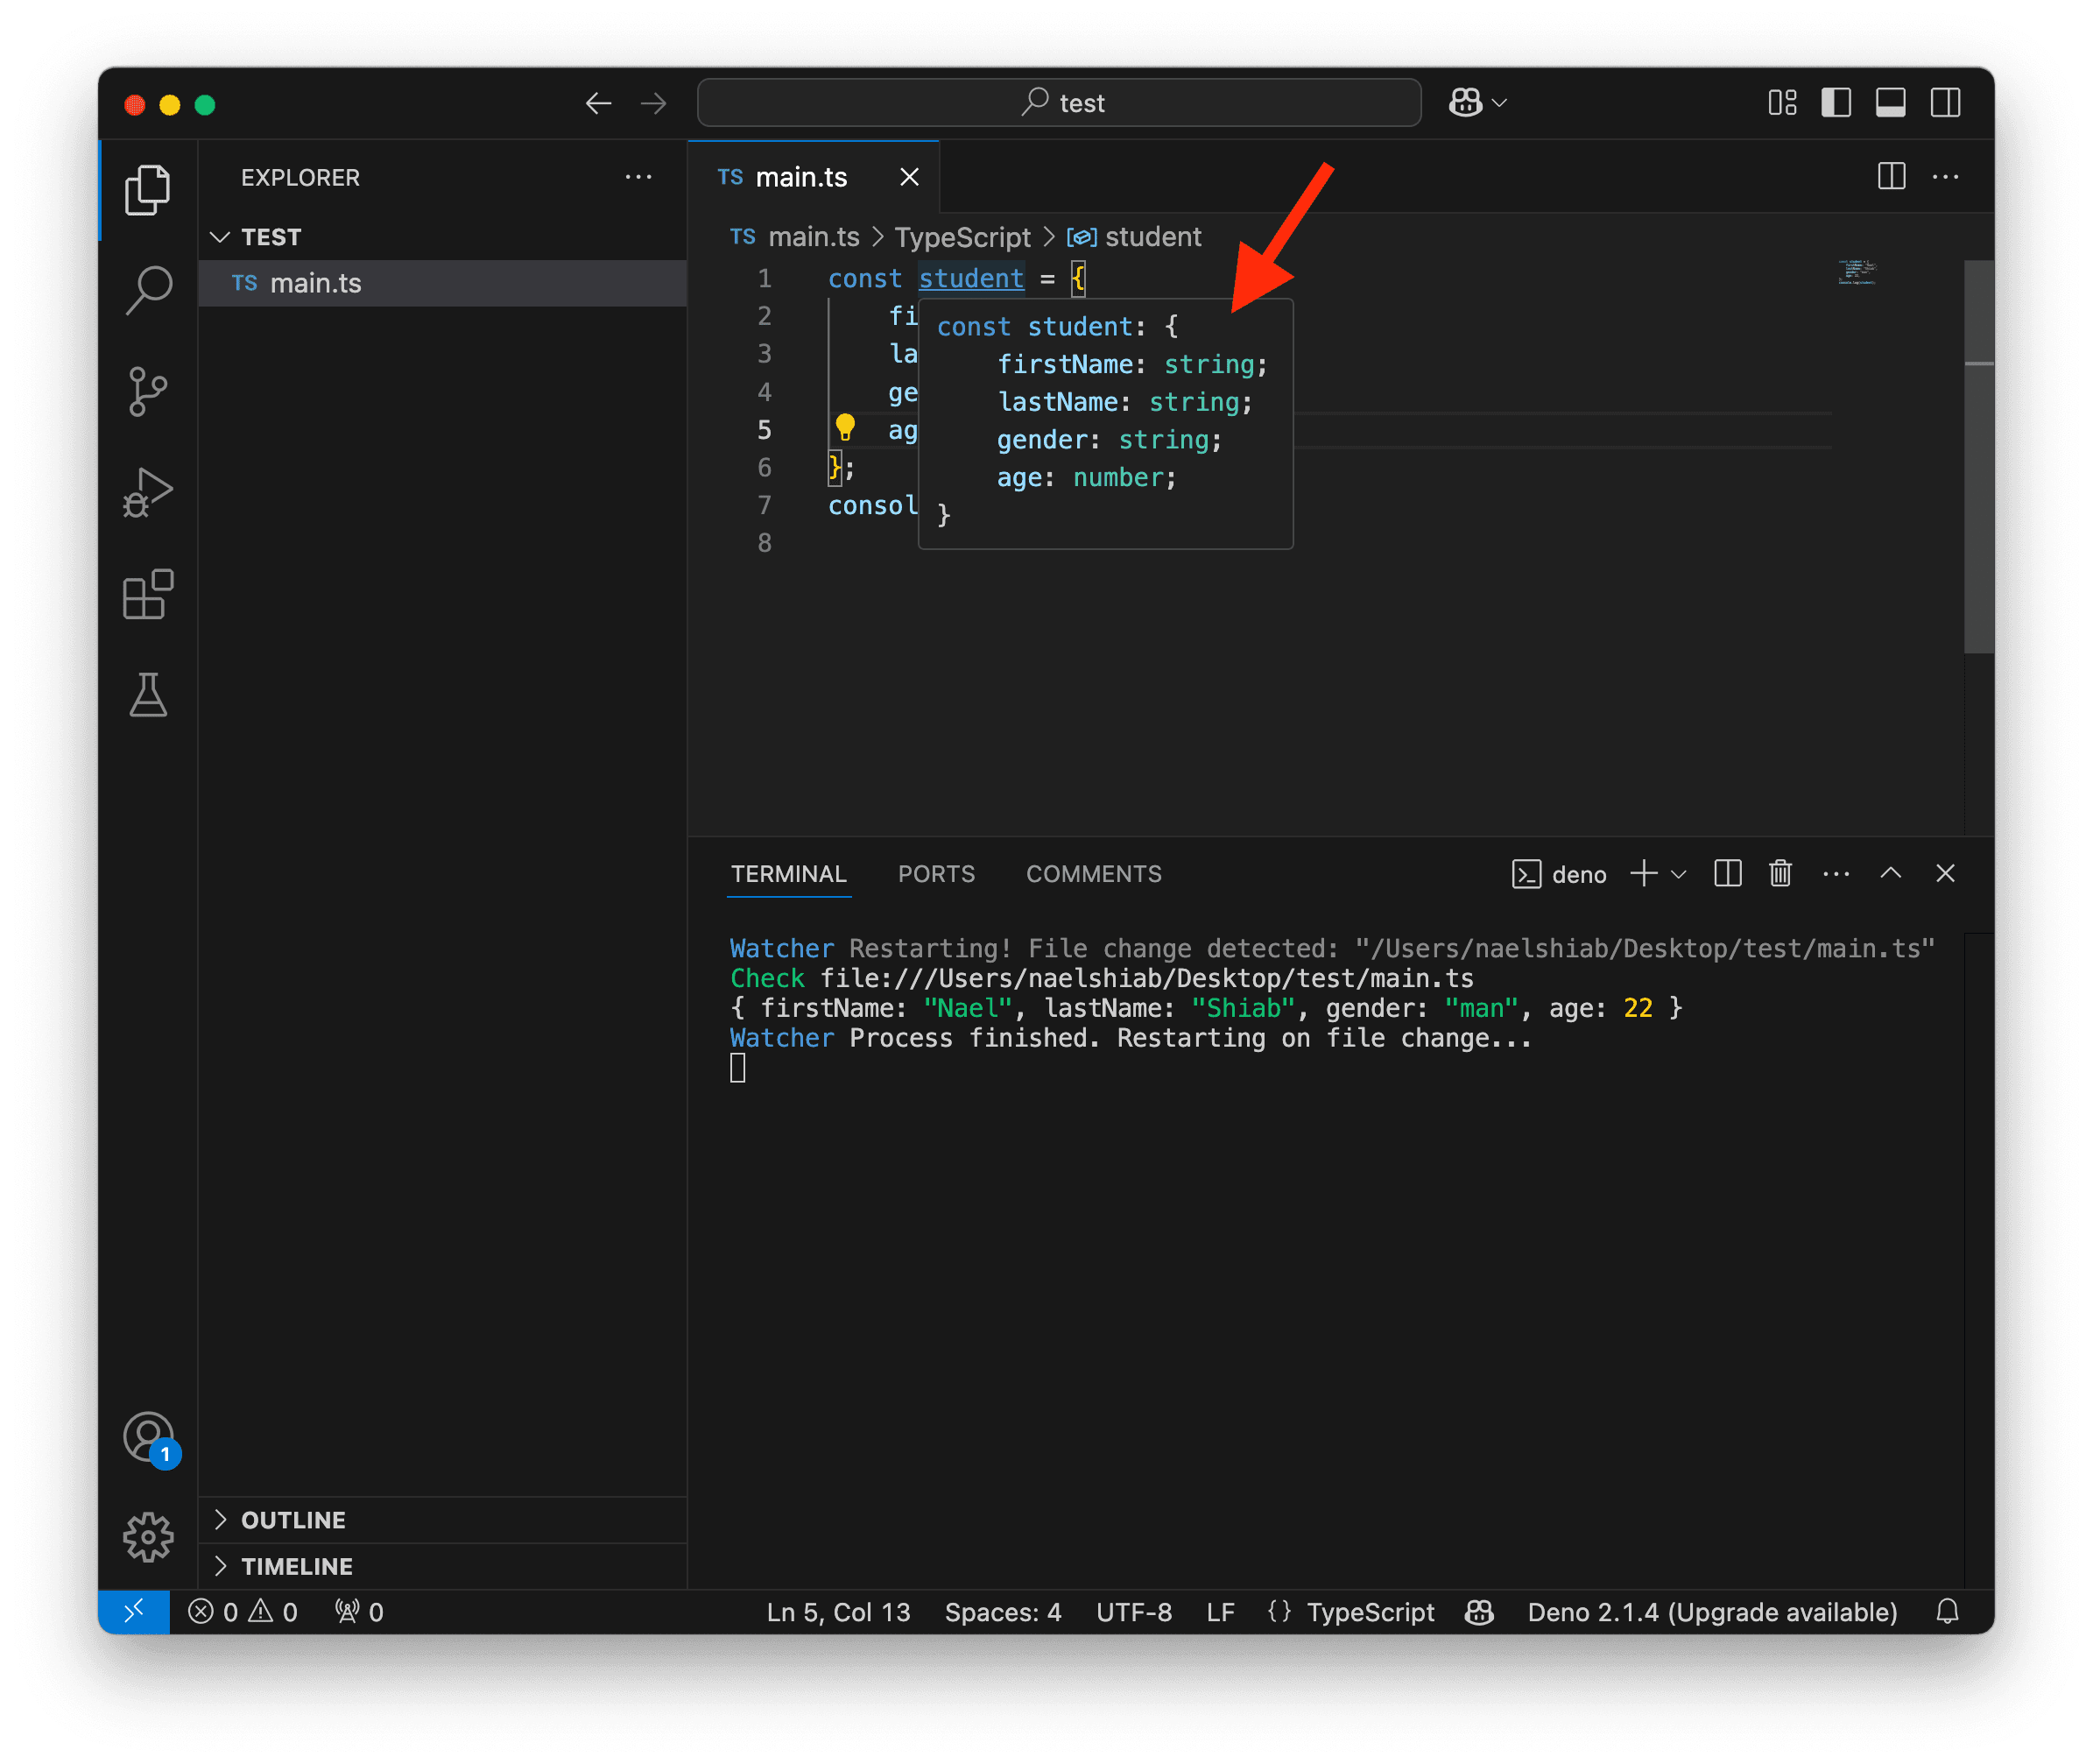
For example, the object below stores data about a student. The keys are firstName, lastName, gender, and age. The corresponding values are "Nael", "Shiab", "man", and 22 (that’s Nael from a long time ago 😅):
const student = {
  firstName: "Nael",
  lastName: "Shiab",
  gender: "man",
  age: 22,
};
console.log(student);In an object, keys can be written as plain identifiers (no spaces or special characters) or as strings. For example, you could replace firstName with "first name". However, as we’ll see below, avoiding spaces will make your life much easier.
To know what’s in an object and the types of its values, you can hover over the object name in VS Code.
Accessing values
To access the value of a specific key, use a . directly after the variable that references the object.
For example, the following code will log Nael to your terminal:
const student = {
  firstName: "Nael",
  lastName: "Shiab",
  gender: "man",
  age: 22,
};
console.log(student.firstName);If the key firstName was written with a space, like "first name", you would need to write student["first name"] to access its value. This is less straightforward and can make your code harder to read and maintain. For this reason, avoiding spaces in keys is usually recommended.
Modifying values
You use the same syntax to modify a value in an object as you do to access it, but with the = operator.
As discussed in the Variables lesson, you must respect the type of the value when modifying it. For example, if a key’s value is initially a number (like with age), it can only be updated with another number.
const student = {
  firstName: "Nael",
  lastName: "Shiab",
  gender: "man",
  age: 22,
};

// Making myself very old.
student.age = 100;

console.log(student);
Autocompletion and checks
When working with objects, you can take advantage of the handy autocompletion feature (also called IntelliSense).
If you type . after a variable referencing an object, a pop-up will appear showing the list of available keys. You can use the up and down arrow keys to navigate through the keys and see their types. Press Enter to select the key you want.

Additionally, because objects are typed, if you try to access a key that doesn’t exist in the object, TypeScript will throw an error before you even run the script. This is shown in the screenshot below.
Many bugs and errors are caused by simple typos. With this feature, TypeScript helps you catch those mistakes early, saving you time and frustration. 🙏

Arrays
It’s time to talk about another data structure: arrays!
Arrays store data in a specific order, enclosed within square brackets ([ and ]). You can store any type of data in an array.
For example, here is an array of student names.
const names = ["James", "John", "Patricia", "Jennifer"];
console.log(names);
If you hover over the variable names, you’ll see that its type is string[], meaning it’s an array composed exclusively of strings. It’s generally best to create arrays containing only one data type (or one type and null, as we will see later).
![A screenshot showing VS Code with a string[] type on hovering.](/_next/image?url=%2F_next%2Fstatic%2Fmedia%2Fstring-array-type.9b3a98d9.png&w=3840&q=75)
Indexes
Because arrays are ordered, we can retrieve a specific data point using an index. Indexes start at 0.
For example:
- To retrieve the name of the first student, use the index
0. - For the second student, use the index
1, and so on.
To access an array value using an index, place the index inside square brackets ([]) immediately after the array or the variable referencing the array.
const names = ["James", "John", "Patricia", "Jennifer"];

// Change the index to see what's being logged.
// If you put a number greater than 3,
// the values will be undefined because
// there are only four items in the array!
const student = names[0];
console.log(student);
You can also modify a value in an array using its index and the = operator. Remember that arrays are typed in TypeScript. For example, if the type of names is string[], you can only replace a value with another string.
const names = ["James", "John", "Patricia", "Jennifer"];

// Changing the string
// at index 0.
names[0] = "Nael";

console.log(names);
Properties
Arrays have a property called length, which returns the number of items in the array. This is useful for determining the size of the array, whether for iteration, validation, or other operations.
To access a property, type a . right after the array or the variable referencing it.
const names = ["James", "John", "Patricia", "Jennifer"];
console.log(names.length);
Methods
One of the most powerful features of arrays is their methods. These methods allow you to easily process and manipulate your data.
To access methods, type a . right after the array or the variable referencing it, just like accessing properties. The difference is that methods must be called with () to trigger them. Often, you’ll need to provide one or more arguments inside the parentheses (more on that later).
Here are a few examples of commonly used array methods.
.push()
The .push() method adds one or more items to the end of an array.
const names = ["James", "John", "Patricia", "Jennifer"];

names.push("Nael");

console.log(names);
// Logs => [ "James", "John", "Patricia", "Jennifer", "Nael" ]
.slice()
The .slice() method creates a copy of the array. You can specify a starting index and a stopping index to copy just a portion of the array.
const names = ["James", "John", "Patricia", "Jennifer"];

// Start at index 0 and end at index 2, not included
const namesSubset = names.slice(0, 2);

console.log(namesSubset);
// Logs => [ "James", "John" ]
.sort()
The .sort() method sorts arrays containing strings in ascending order by default.
It’s also possible to pass an argument to sort other data types in a specific manner, but we’ll cover that later.
const names = ["James", "John", "Patricia", "Jennifer"];

names.sort();

console.log(names);
// Logs => [ "James", "Jennifer", "John", "Patricia" ]
.includes()
The .includes() method checks if a value exists in the array and returns a boolean.
const marks = [33, 45, 78, 98];

console.log(marks.includes(45));
// Logs => true

console.log(marks.includes(100));
// Logs => false
.find()
The .find() method searches for a value in the array. If no value matches the condition, it returns undefined. If multiple values match the condition, it returns the first one.
This method requires a function as an argument. We’ll cover functions in the next lessons.
const marks = [33, 45, 78, 98];

// Find the first mark greater than 50
// and put it in a variable.
const above50 = marks.find((mark) => mark > 50);
console.log(above50);
// Logs => 78

// Find the first mark greater than 100.
const above100 = marks.find((mark) => mark > 100);
// There is none, so the value is undefined.
console.log(above100);
// Logs => undefined
.filter()
The .filter() method creates a new array containing only the items that match a specific condition.
This method requires a function as an argument. We’ll cover functions in the next lessons.
const marks = [33, 45, 78, 98];

// Create a new array with
// marks above 50.
const above50 = marks.filter((mark) => mark > 50);

// The original array is unchanged.
console.log(marks);
// Logs => [33, 45, 78, 98]

// The new array contains only
// marks above 50.
console.log(above50);
// Logs => [78, 98]
.map()
The .map() method allows you to transform each item in the array into a new value and places the result in a new array.
This method requires a function as an argument. We’ll cover functions in the next lessons.
For example, the code below doubles each mark.
const allMarks = [33, 45, 78, 98];

// Here, we multiply each mark by 2
// and store the result in a new array.
const marksMultiplied = allMarks.map((mark) => mark * 2);

// The original array is not changed.
console.log(allMarks);
// Logs => [33, 45, 78, 98]

// The new array contains the marks
// multiplied by 2.
console.log(marksMultiplied);
// Logs => [ 66, 90, 156, 196 ]
Chaining
Another advantage of using array methods is that they can be chained. Since they return an array, you can call one method after another.
const allMarks = [33, 45, 78, 98];

// Here we chain the array methods.
// First, we multiply each mark by 2.
// Then we filter out the marks that are
// less than or equal to 100.
// Finally, we sort the marks in descending order.
const newMarks = allMarks
    .map((mark) => mark * 2)
    .filter((mark) => mark > 100)
    .sort((a, b) => b - a);

console.log(newMarks);
// Logs => [196, 156]So far in our code, each line has ended with a ;. However, from line 8 to line 11, there are no semicolons because we are chaining methods. Everything between these lines is part of the same statement. Technically, you could write it all on one line, but that would make the code less readable. Since TypeScript doesn’t care about line breaks or indentation, it’s up to the user to format the code as they prefer. In our case, we let the Deno formatter handle that for us.
Others
There are many other array methods, but the ones above are the ones you’ll use the most.
If you’re curious, you can check out the W3Schools documentation for more information.
You can also use IntelliSense directly in VS Code. Type . right after a variable referencing an array to see a list of properties and methods pop up. Use your up and down arrow keys to explore.
Additionally, methods are typed. So, don’t worry if you make a typo. It will be caught before you run your code and cause everything to crash. 🤓

Arrays of… objects!
Objects are great for storing data in an intuitive format, while arrays come with handy methods to easily process data. So why not combine the two?
Say hello to arrays of objects!
This is one of the most common ways to represent data: an array of objects where each object shares the same keys.
Here’s an example using our students’ names and marks. Each object stores data about one student, with all students having the same keys. These objects are then grouped together in an array.
You can think of each object as a row in a table. In fact, you can switch console.log to console.table and see a beautiful table displayed in your terminal!
const students = [
  { name: "James", mark: 33 },
  { name: "John", mark: 45 },
  { name: "Patricia", mark: 78 },
  { name: "Jennifer", mark: 98 },
];
console.table(students);
Now things are getting interesting. This pattern provides a flexible way to work with data.
For example, you can filter based on a specific key while preserving the rest of the data for each student.
It’s the best of both worlds!
const students = [
  { name: "James", mark: 33 },
  { name: "John", mark: 45 },
  { name: "Patricia", mark: 78 },
  { name: "Jennifer", mark: 98 },
];

// Notice how we access the mark key
// for each student object.
const studentAbove50 = students.filter((student) => student.mark > 50);

// The original array is not changed.
console.table(students);

// The new array contains only students
// with marks above 50.
console.table(studentAbove50);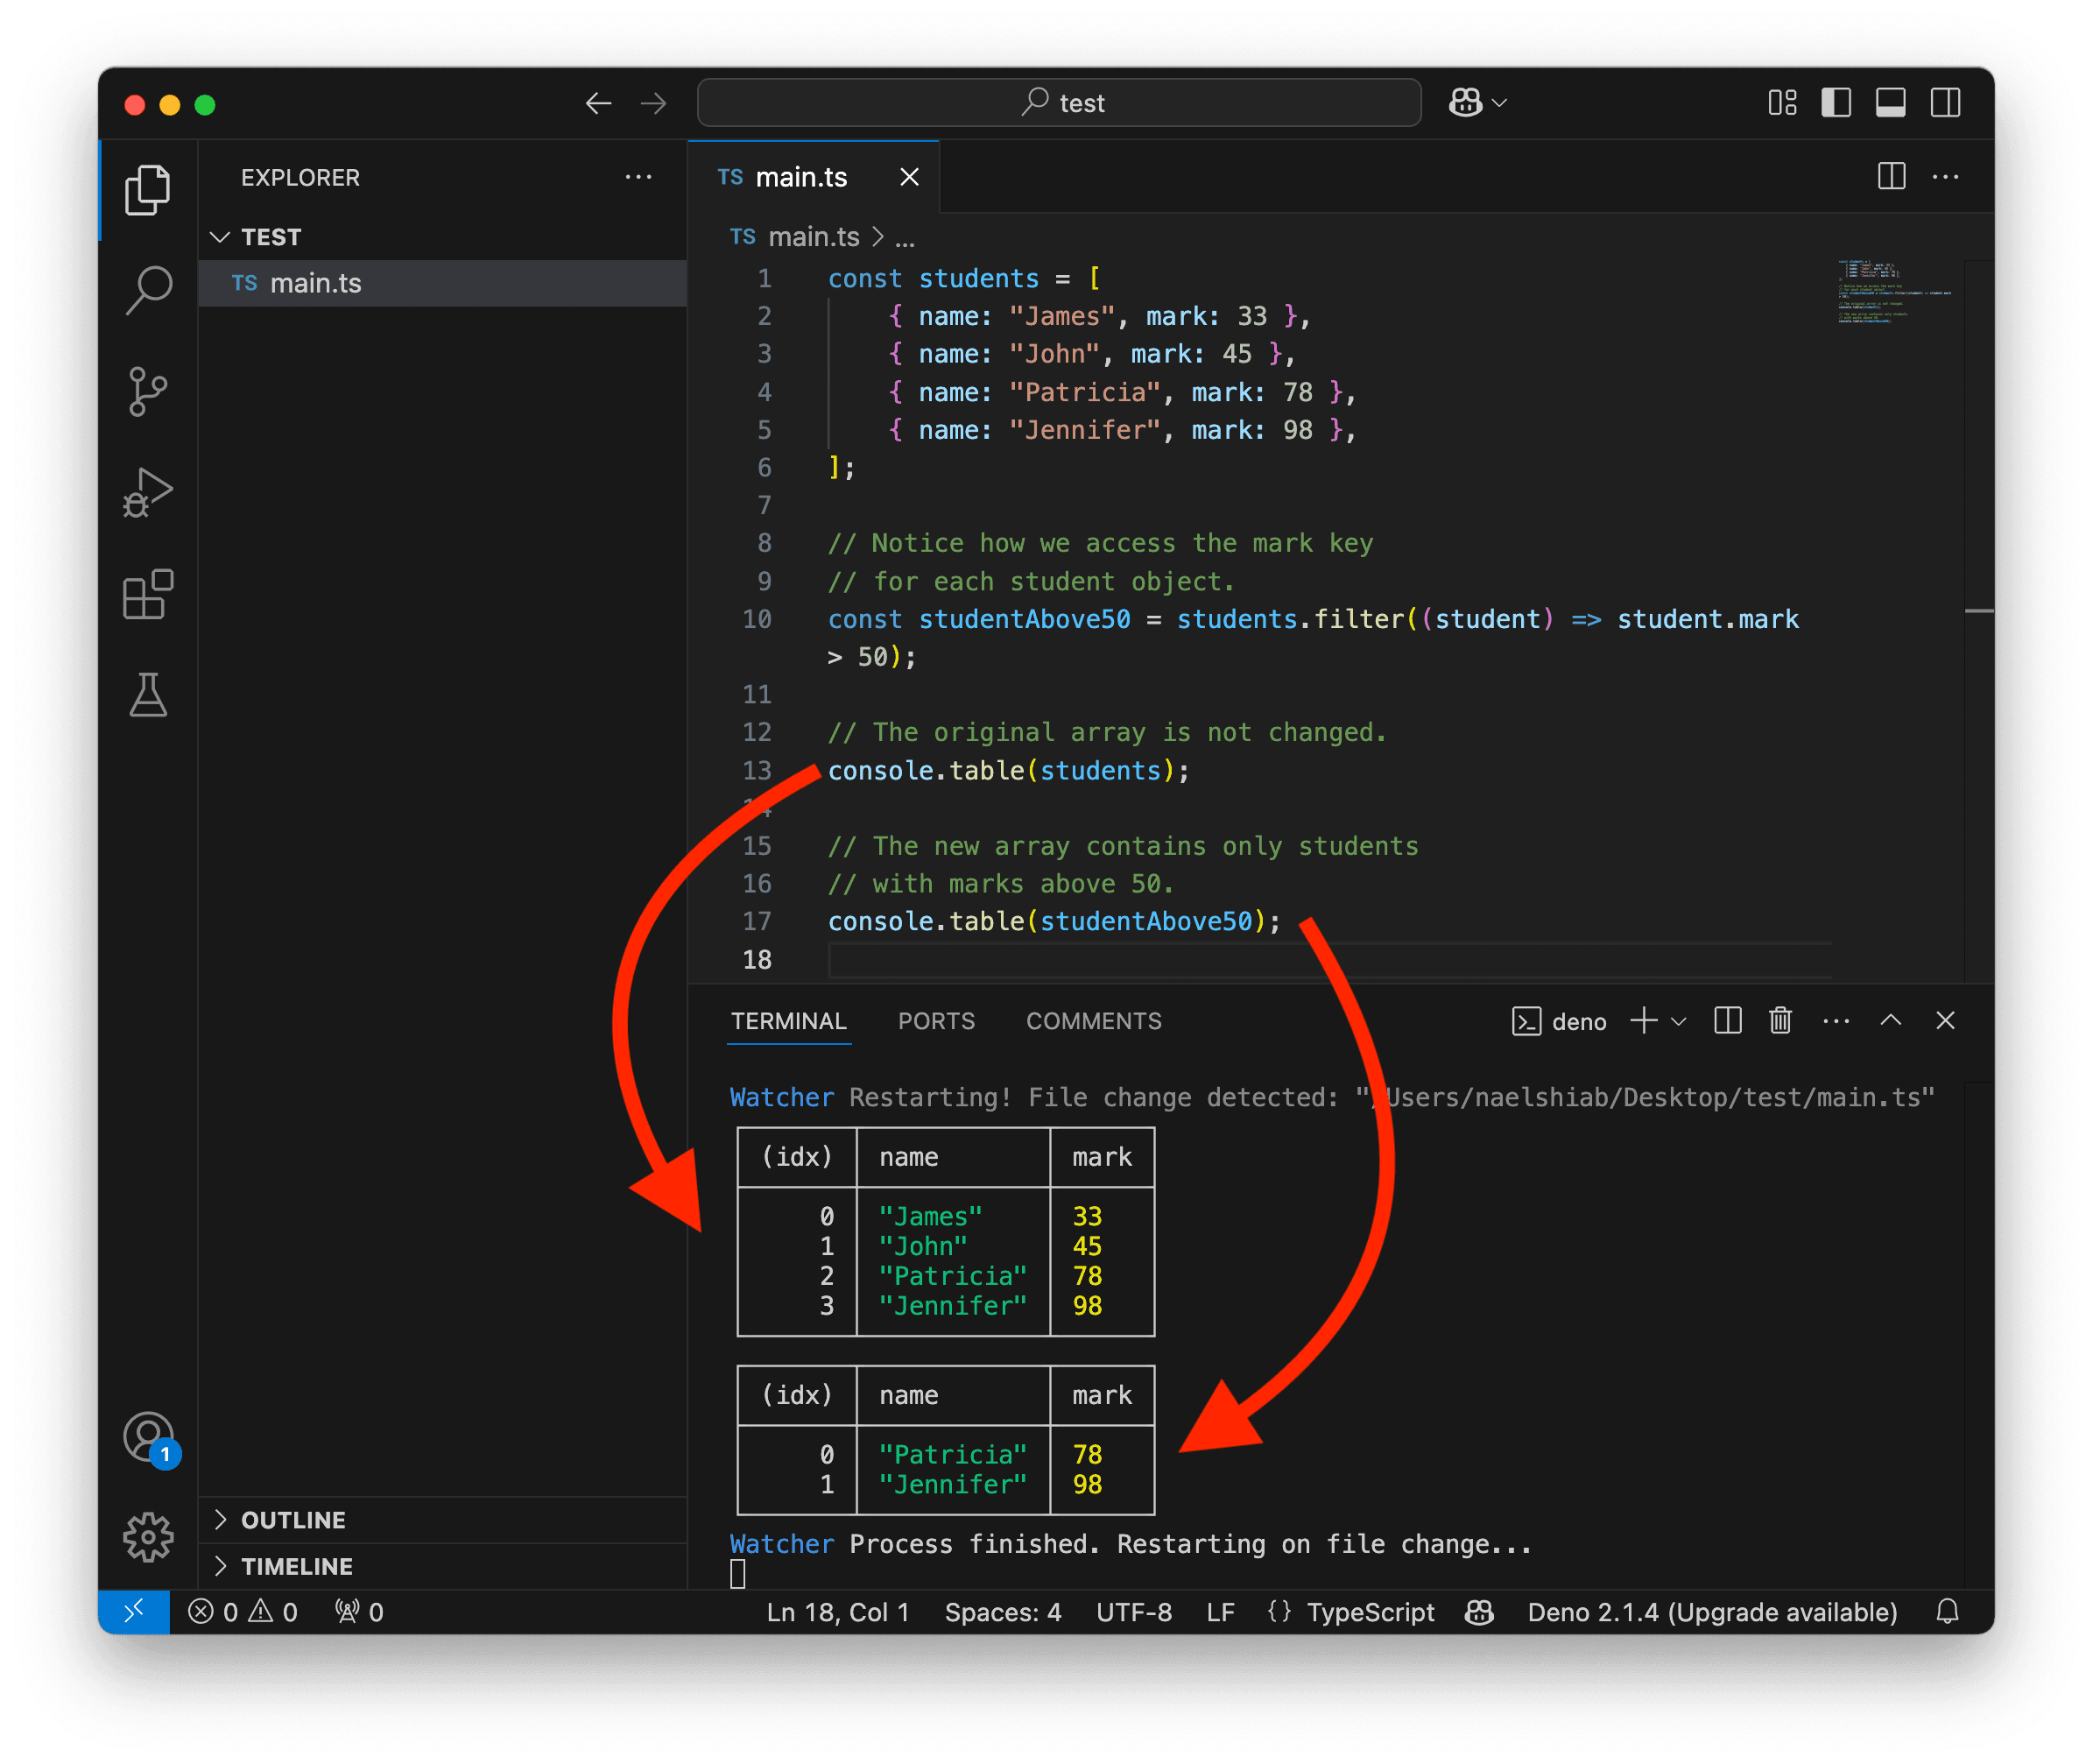
Conclusion
There’s much more to explore about objects and arrays… And there are other data structures like Map and Set. However, I think this is already a solid foundation for you.
What we’ve covered represents about 90% of what you’ll use on a daily basis. And I don’t want to overload your brain too soon! (Too late? 😬)
Now, let’s dive into loops and conditions. We’re closer than ever to building our first actual project!