Setup
First, let’s install everything we need.
You might need administrator rights. If you are on your work computer and don’t have them, ask your IT department.
Code editor
Code is just text. You can write your code in any text editor, but it’s more convenient to use a code editor that comes with many useful features.
You have many free and interesting options, but the most popular is Visual Studio Code, and it’s the one we will use. It’s an open-source project maintained by Microsoft.
Download it from the website and install it.
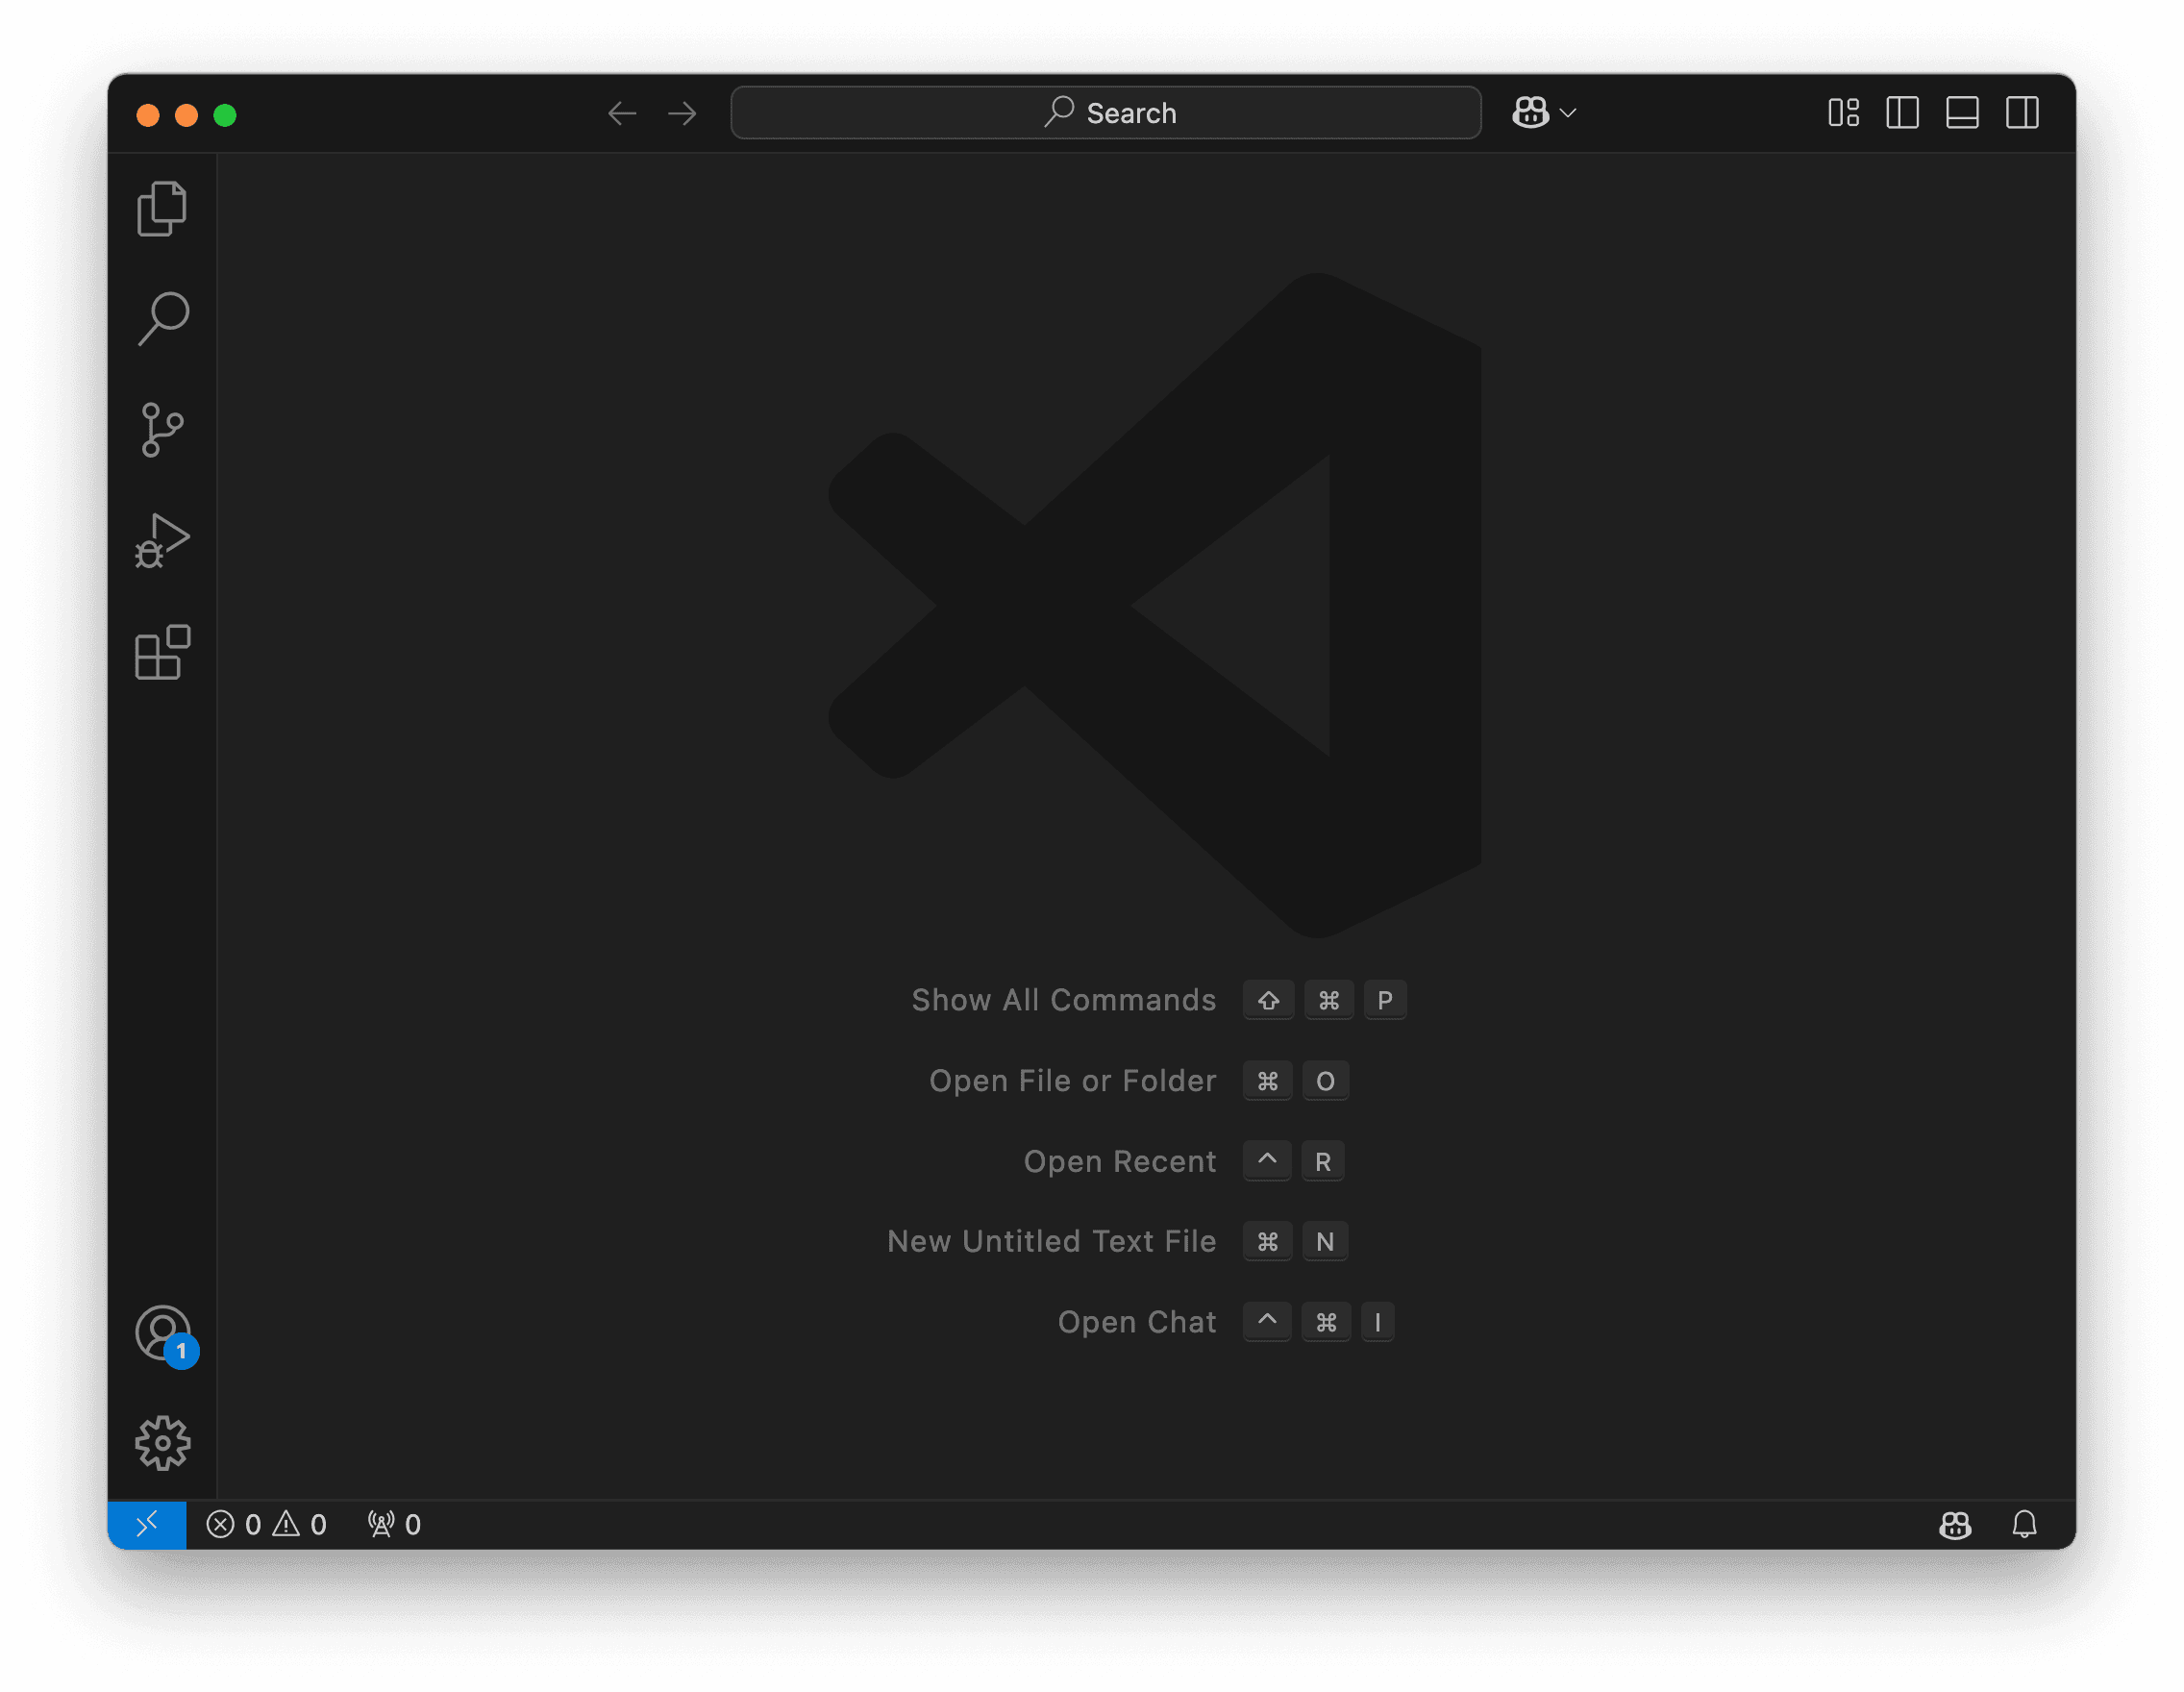
Once installed, open it. It should look like this. It’s okay if you have different tabs open.
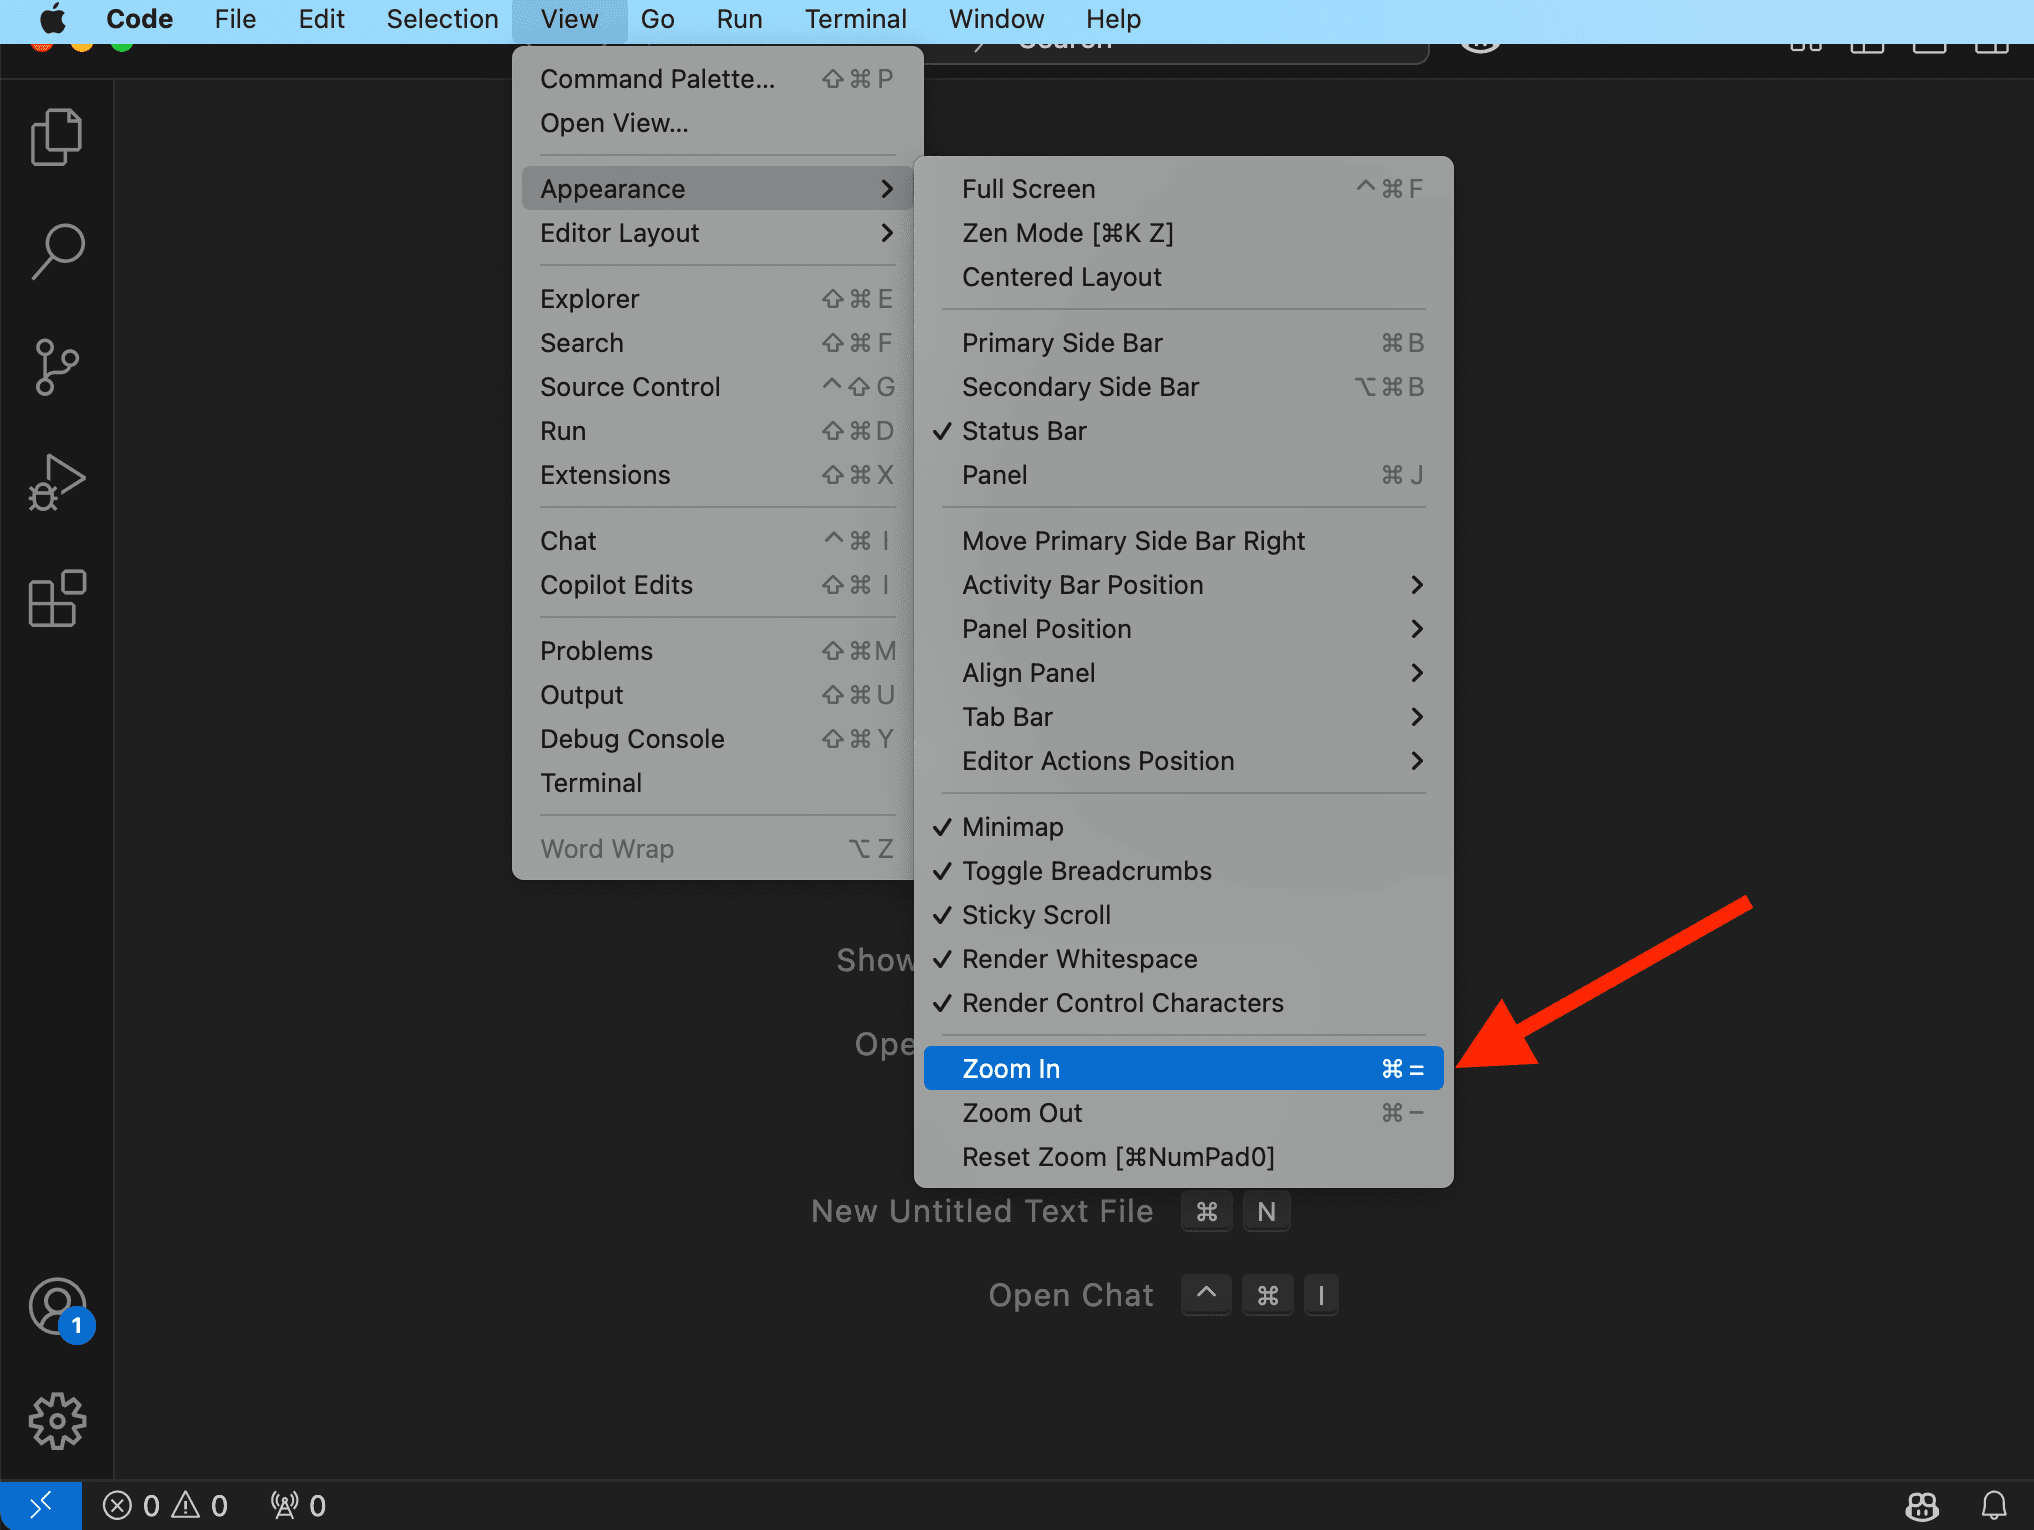
Personally, I find the interface to be too small and I always adjust it to be a bit bigger when I set up a new machine. To do so, click on the View => Appearance => Zoom In menu.
Runtime
For your computer to understand TypeScript and execute it, you need a runtime.
Again, you have many great open-source options out there, but I find Deno particularly easy to use. Deno is maintained by Deno Land Inc., with Ryan Dahl as the CEO. Dahl also created Node.js, another open-source runtime that is very popular.
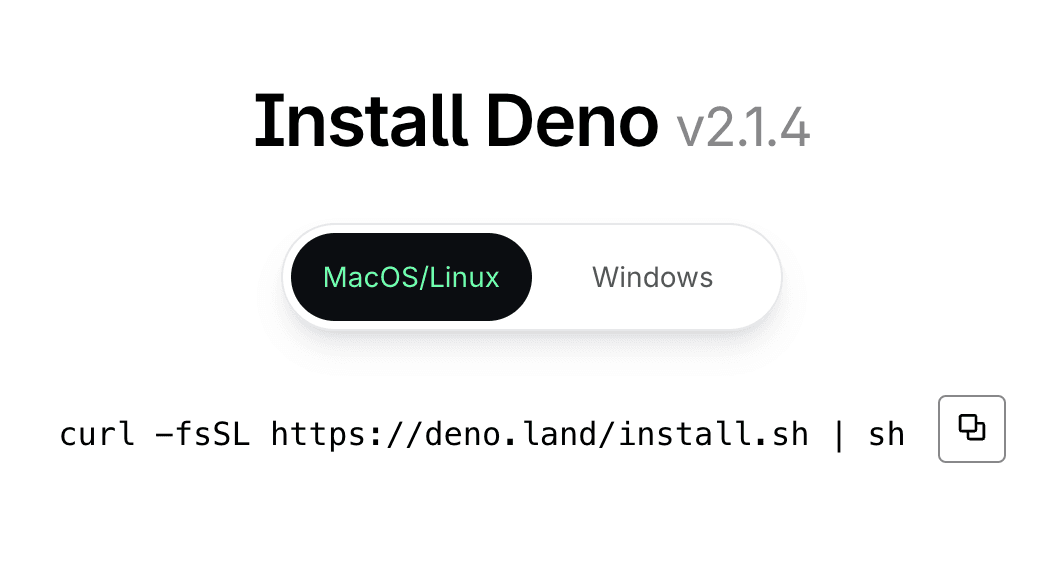
To install it, visit the website and copy the relevant command for your operating system.
Don’t worry if you have a different version. As long as it’s v2.x.x, you will be fine.
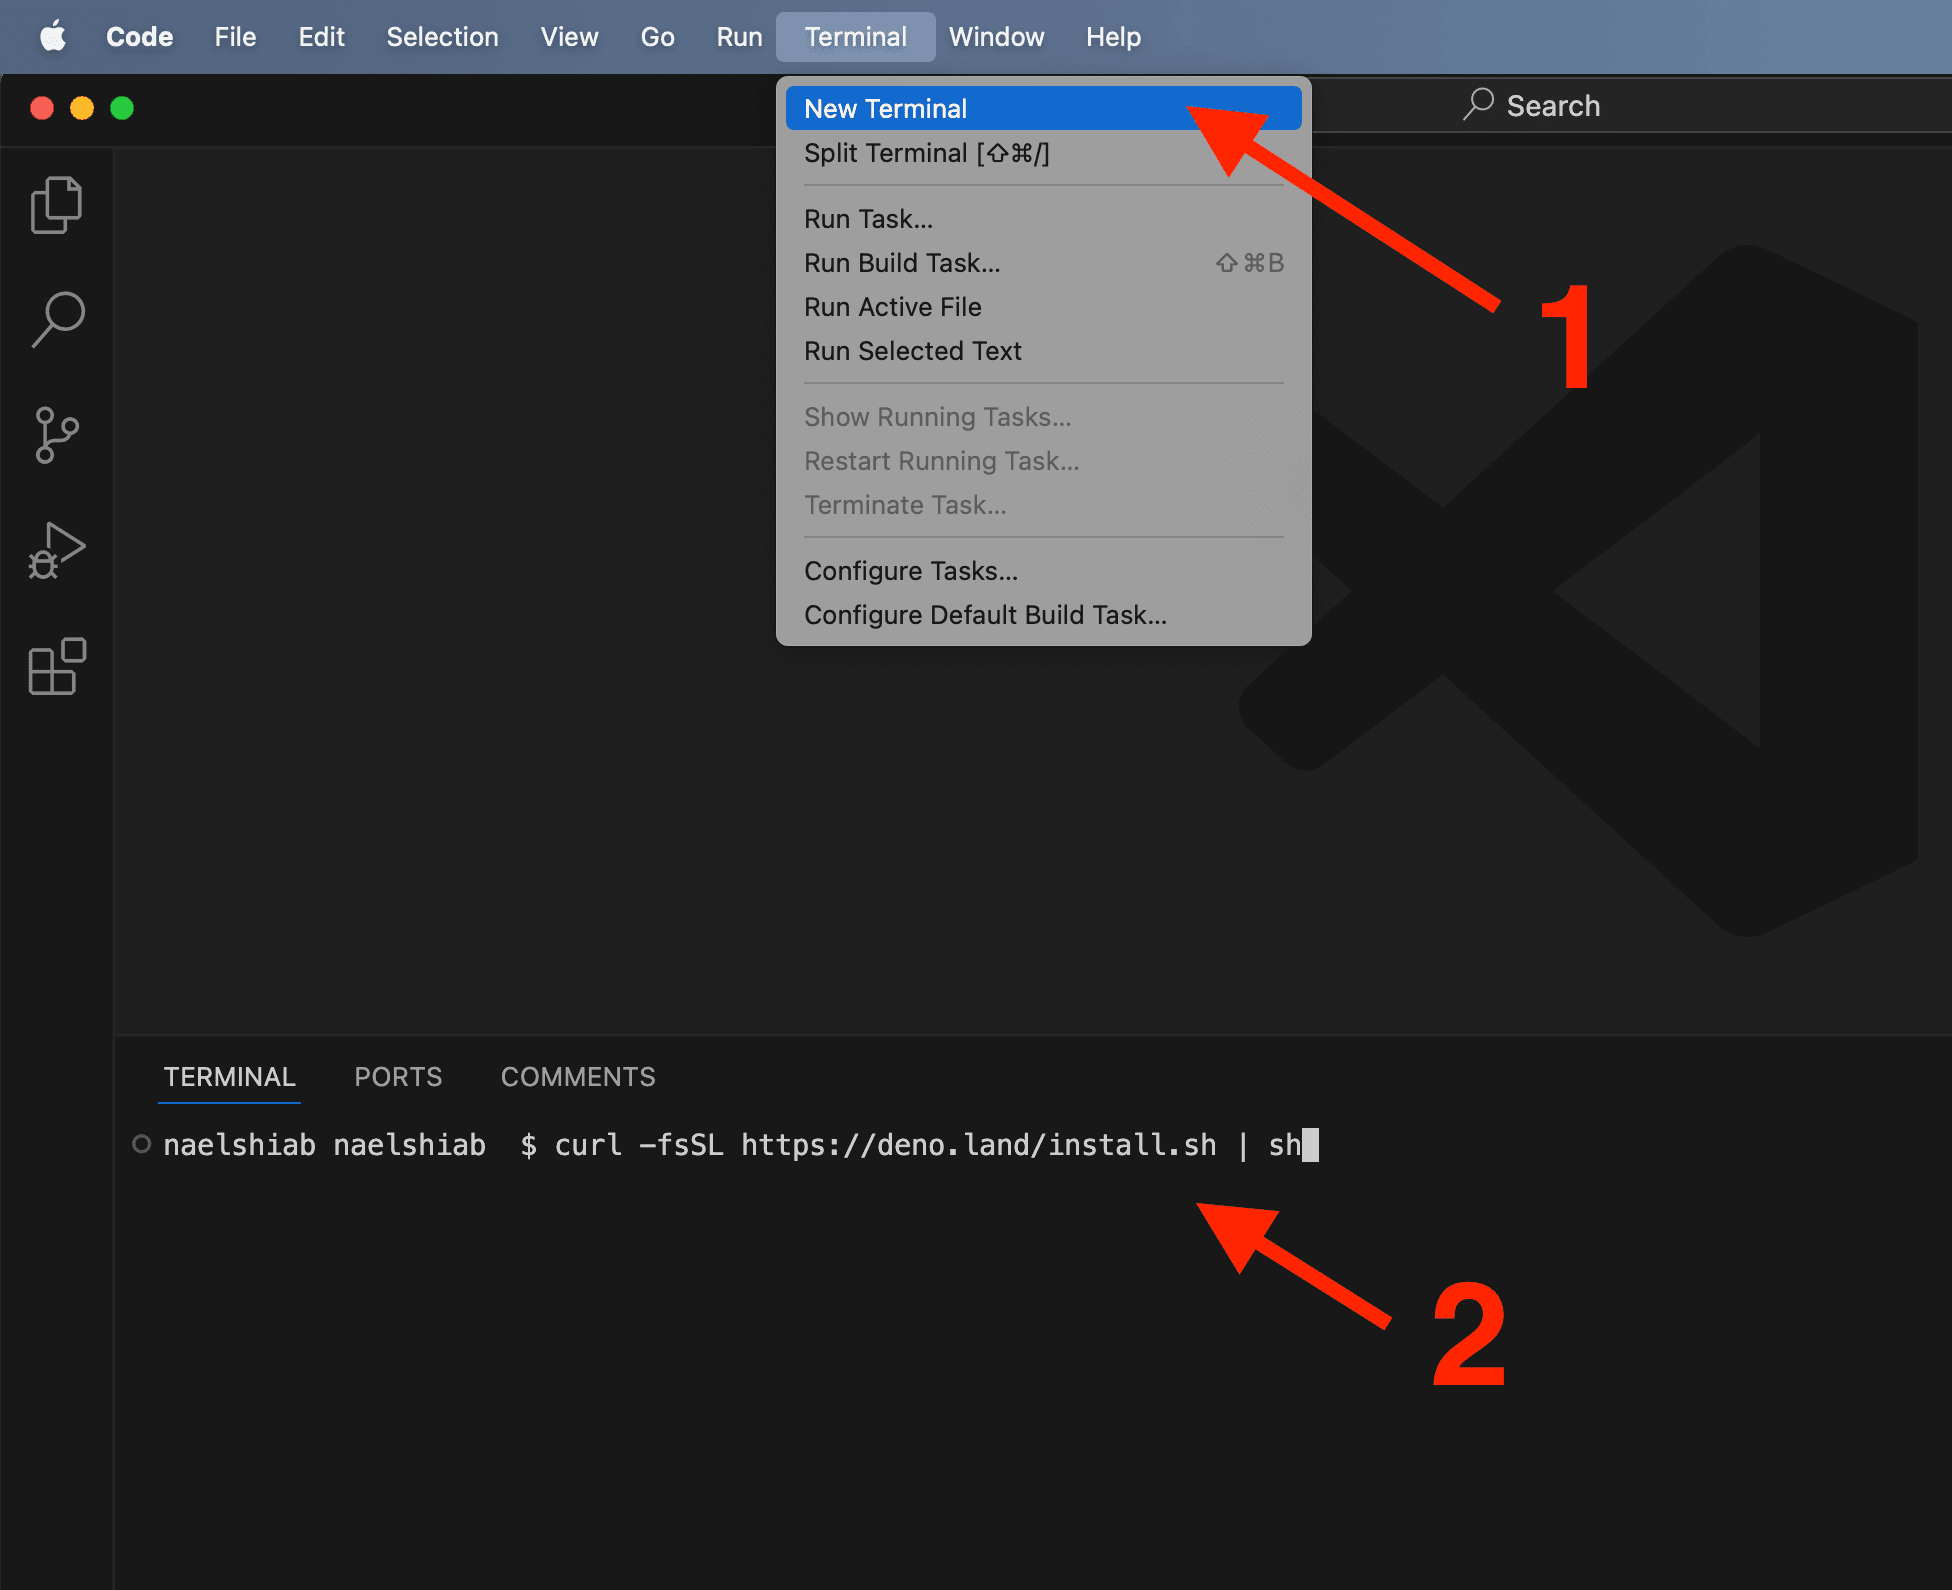
Then, follow these steps:
- Open a new terminal in VS Code.
- Paste the command you copied just before and press enter to run it.
The command will download and install Deno on your computer.
If you are asked to add Deno to your path, type Y and press enter. This ensures Deno is easily accessible from your terminal. If you’re not asked, it’s okay.

And if you are asked to set up completions, choose bash or zsh depending on your operating system by using the up and down keys and pressing the space bar. Then press enter. This provides a handy auto-completion helper in the terminal. Again, if you’re not asked, it’s okay.
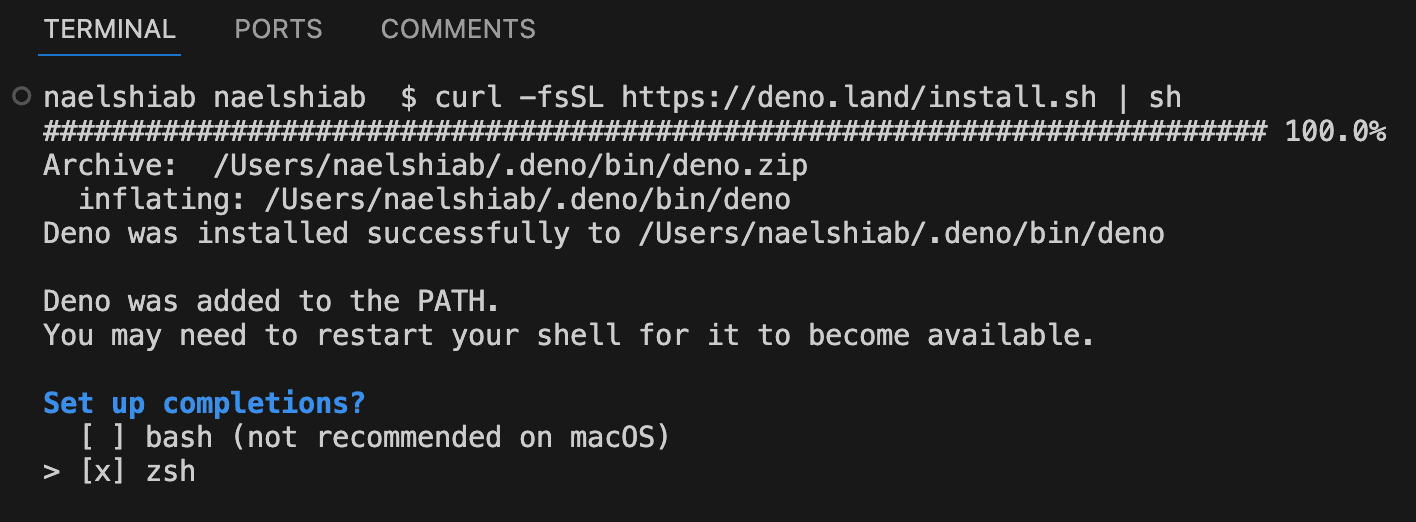
Now, everything should be properly installed.
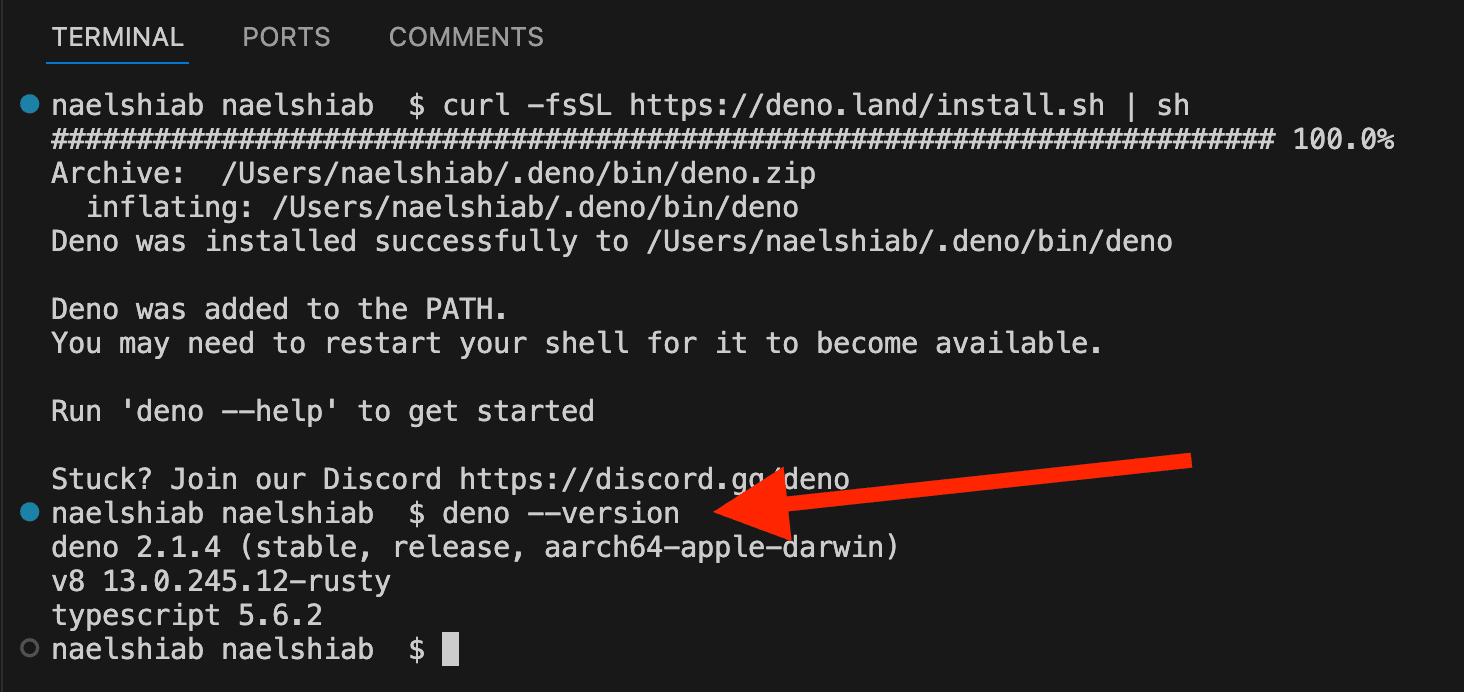
Quit and restart VS Code. Then type deno --version in your terminal and press enter to display your Deno version. You should see something like this!
Extensions
VS Code has a wonderful extensions ecosystem and the Deno team created a very useful one to help you code efficiently.
Follow these steps to install it:
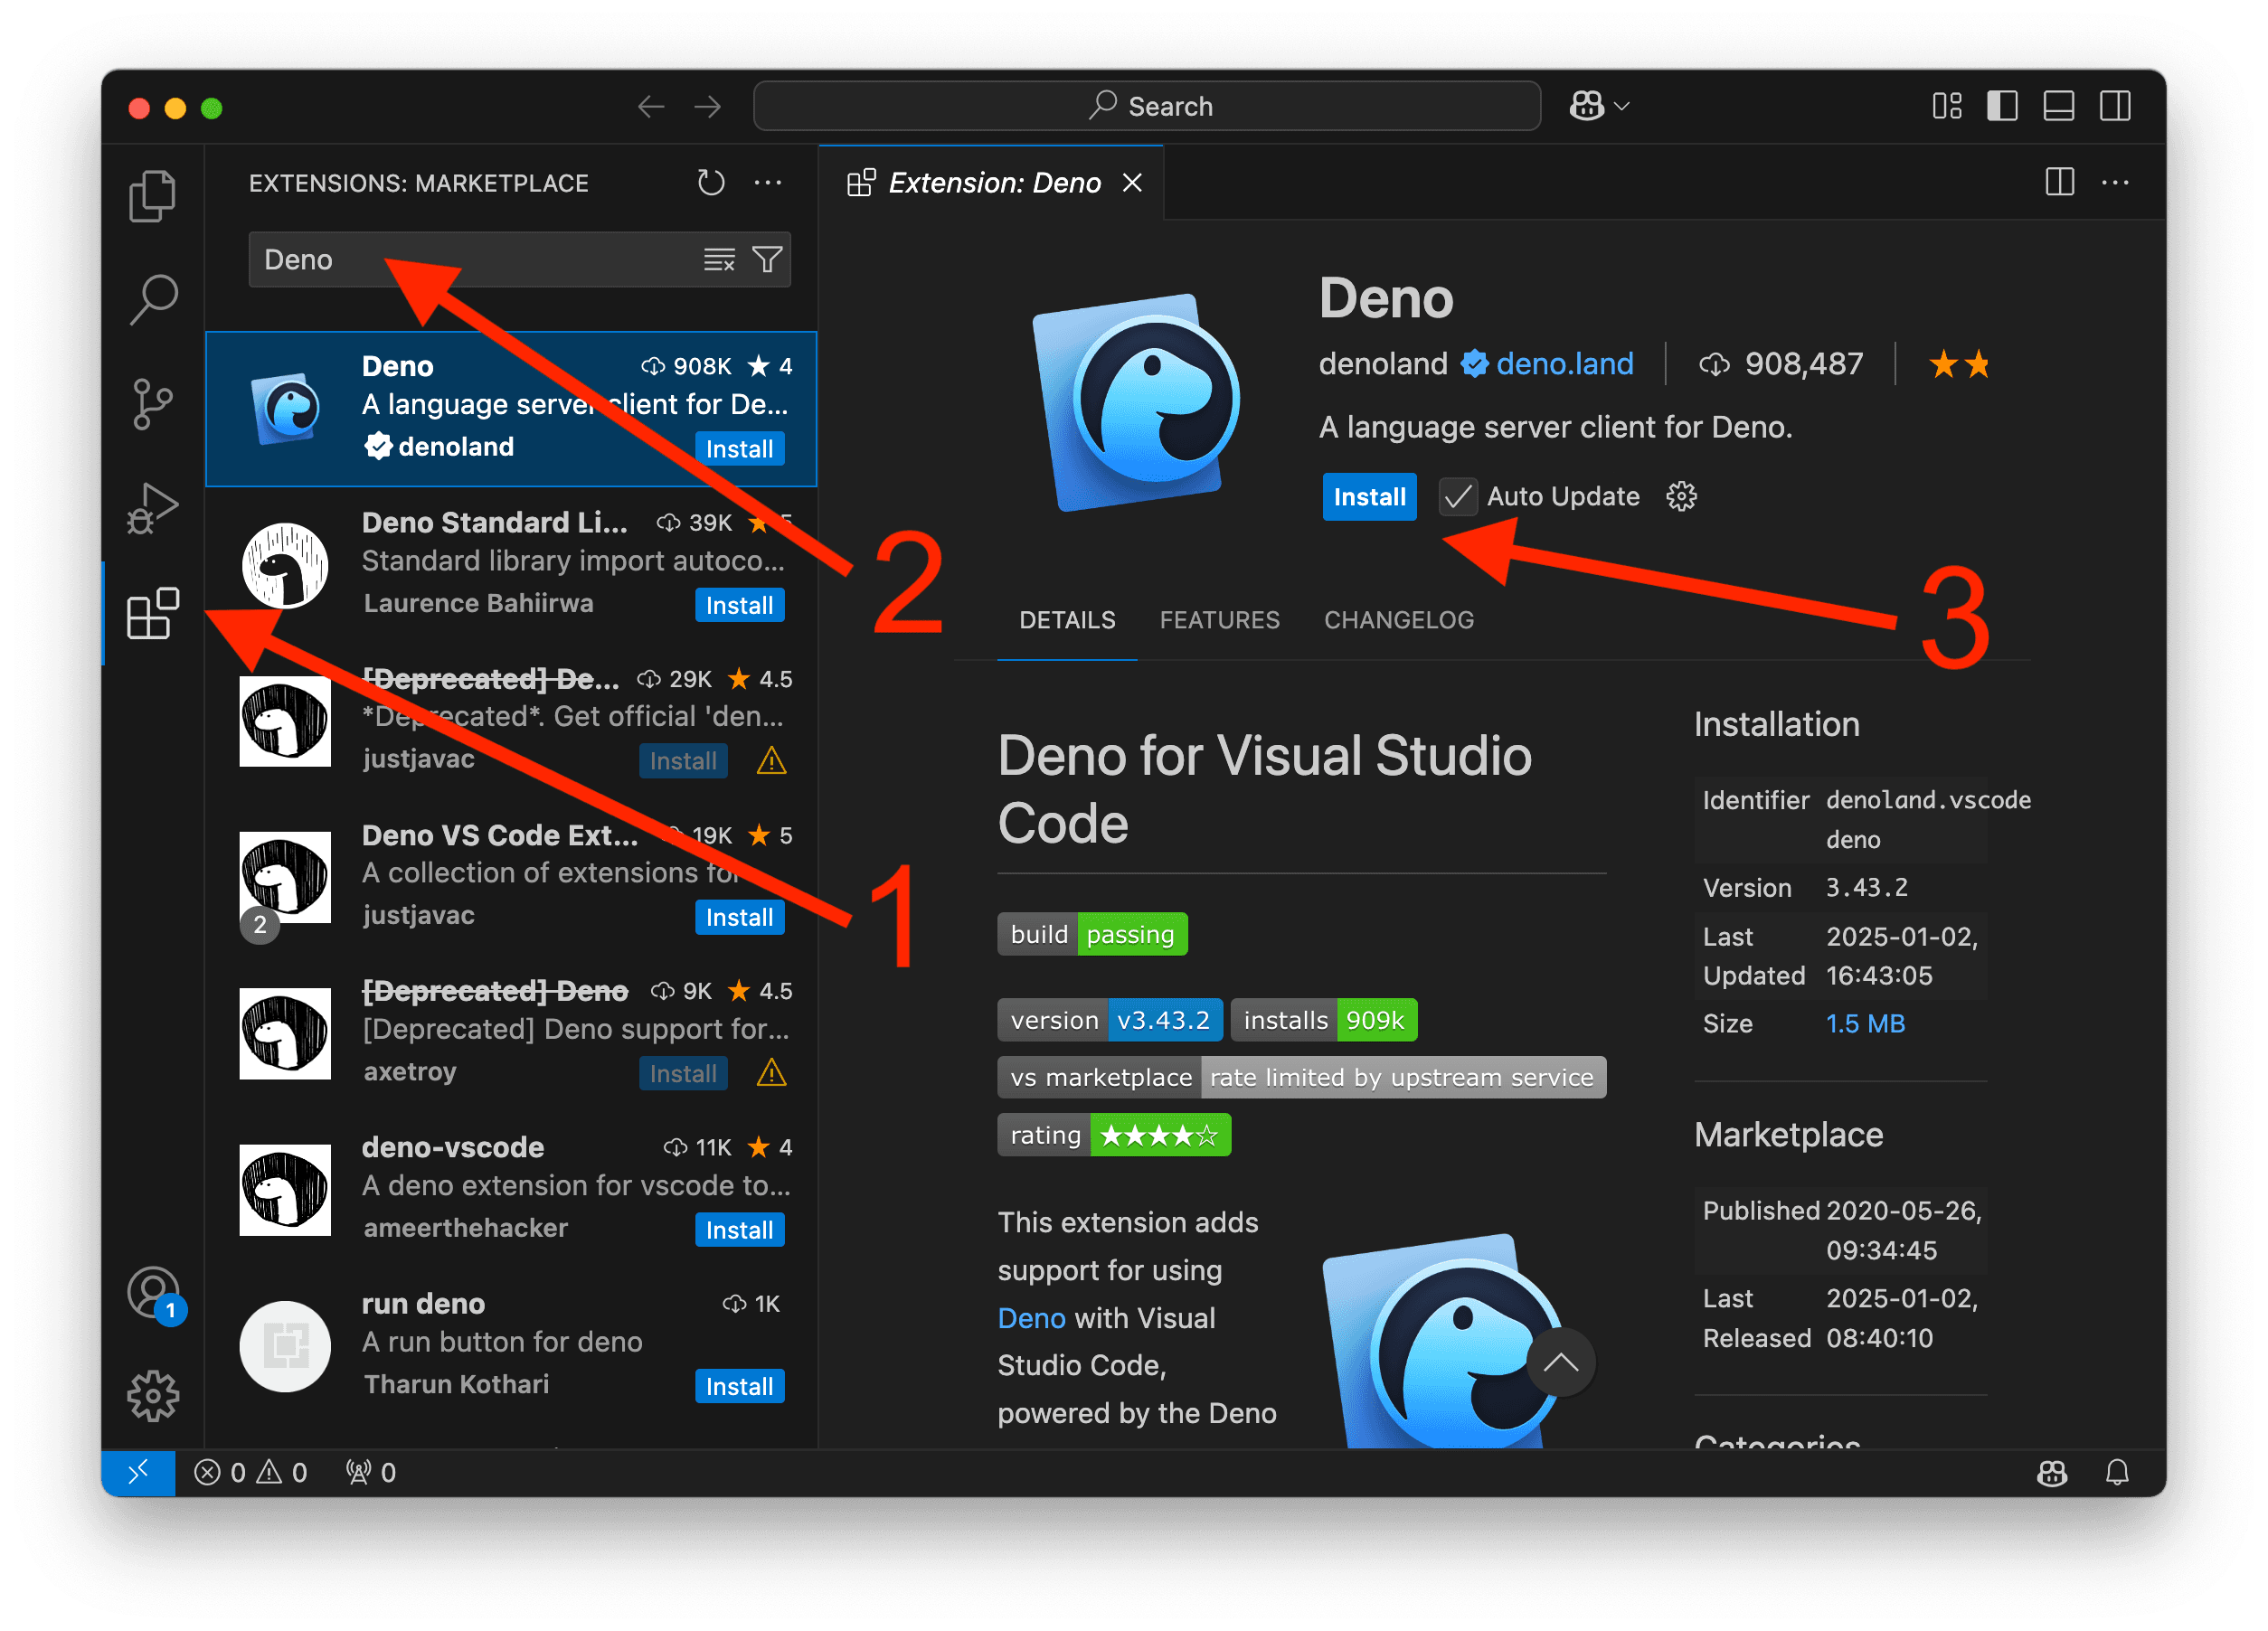
- Click on the Extensions tab on the left side of VS Code.
- Search for the Deno extension.
- Install the Deno extension. Make sure
Auto updateis checked.
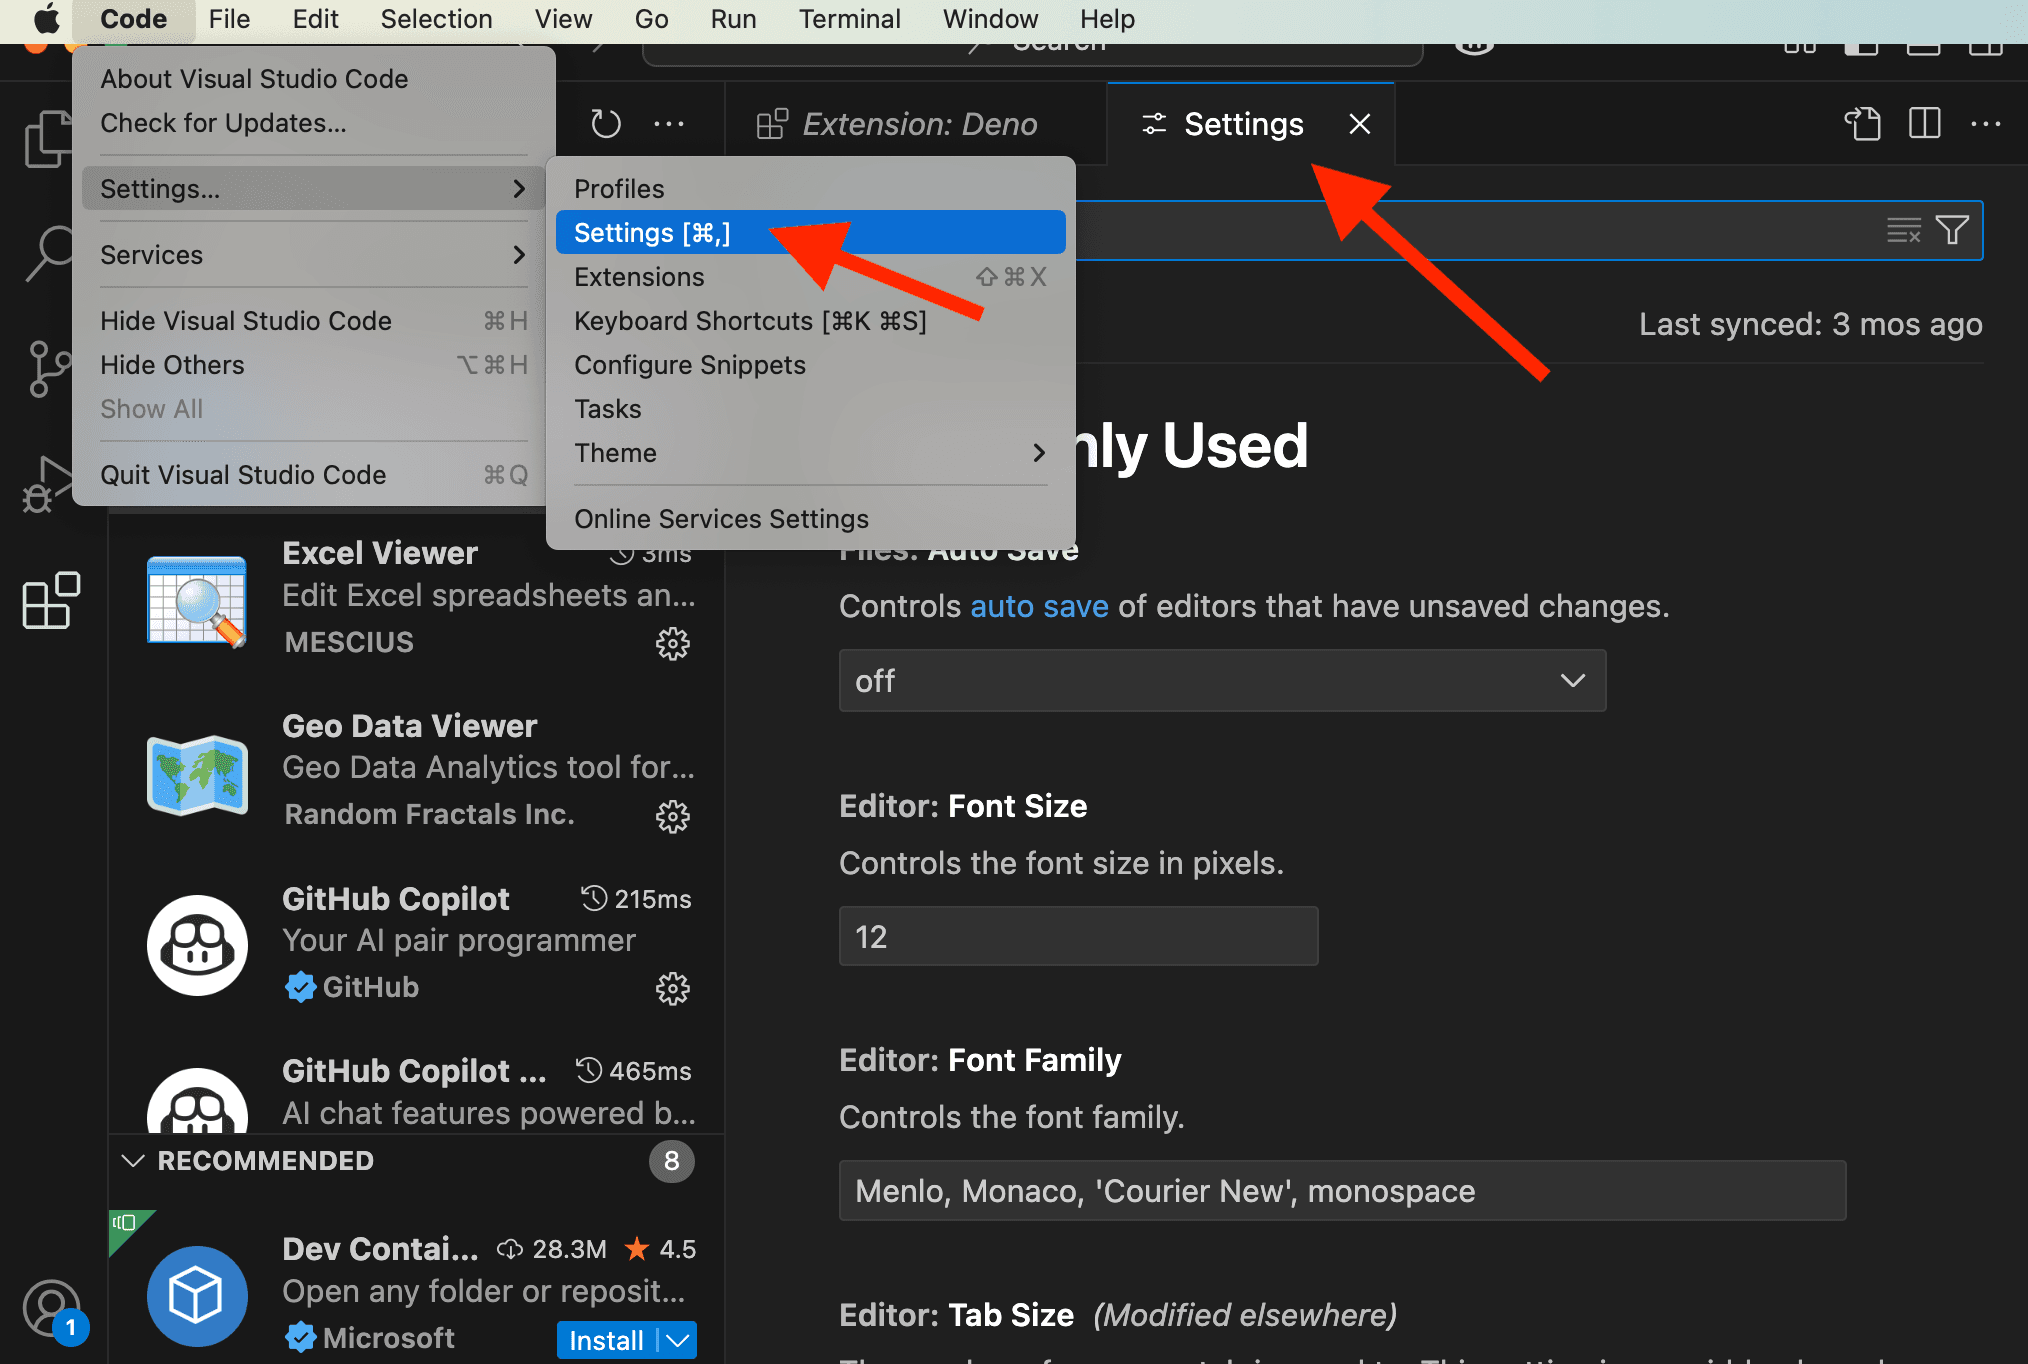
One of the great features of the Deno extension is its formatter. Let’s update the VS Code settings so it will automatically format our code when we save a file. This will help keep everything clean and tidy.
- On Mac, go to
Code => Preferences => Settings. - On Windows, go to
File => Preferences => Settings.
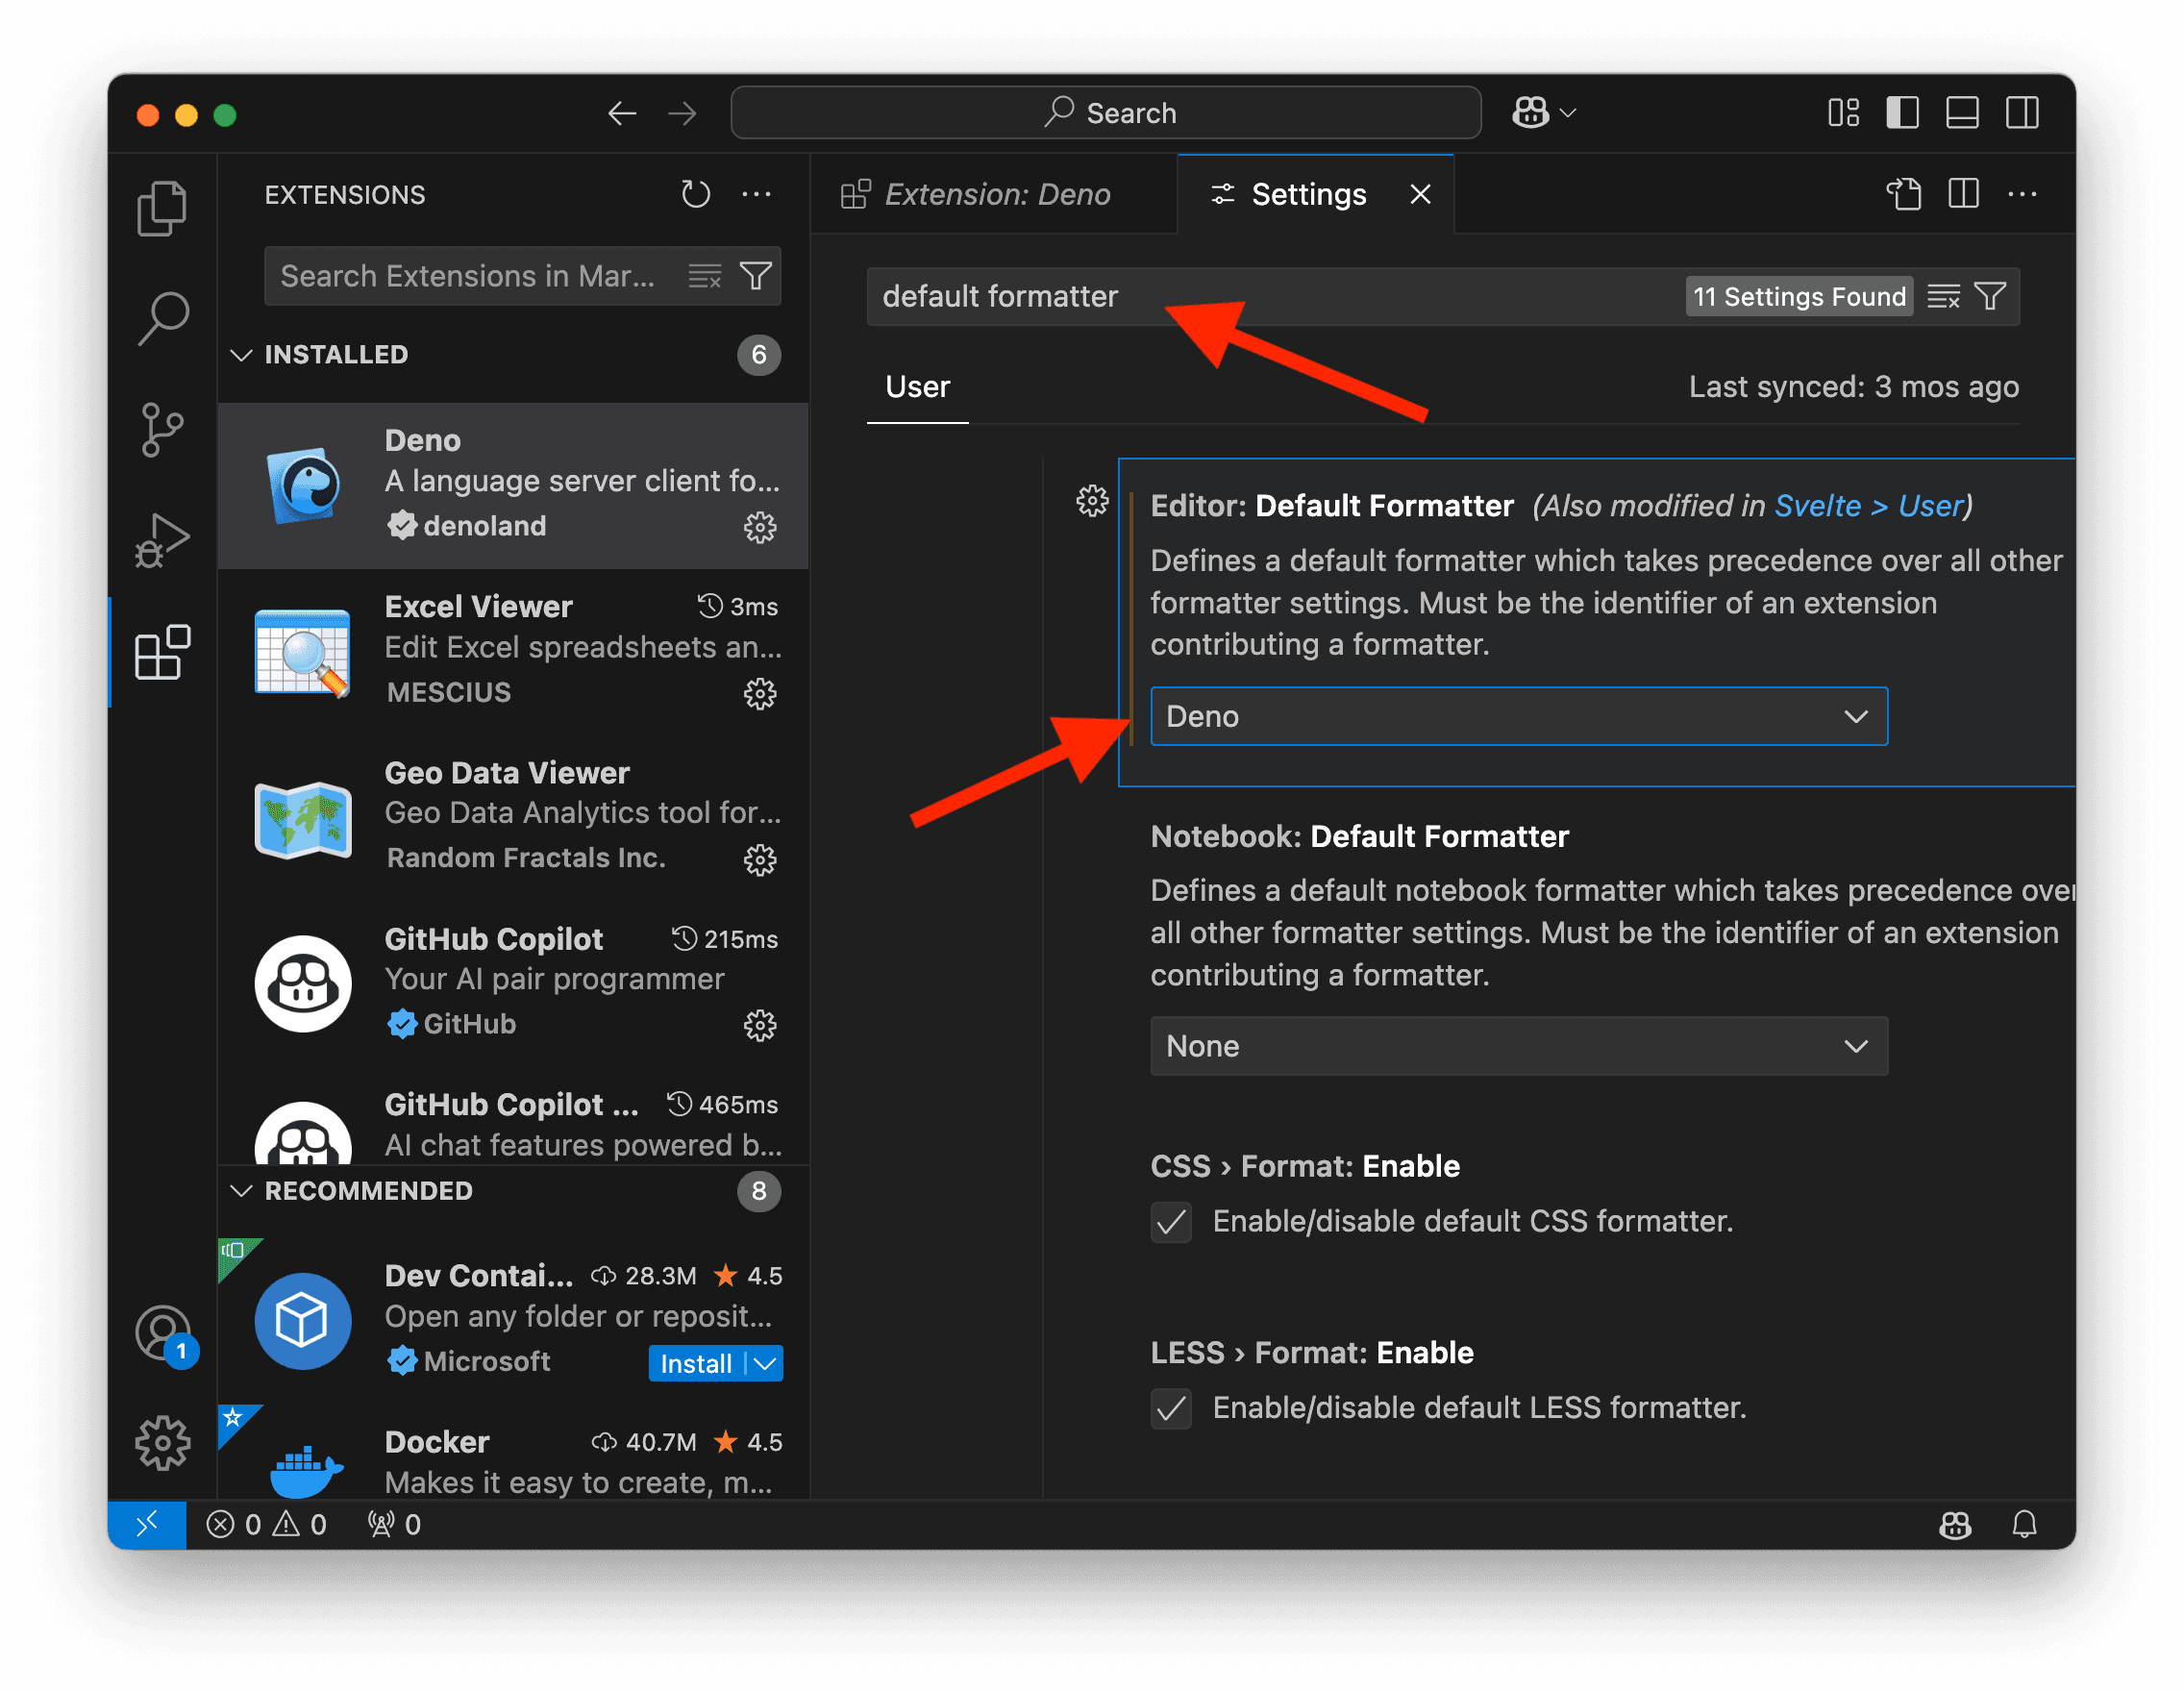
Search for Default Formatter in the search bar and select Deno from the dropdown menu.
Search for Format On Save and check the box to enable it.
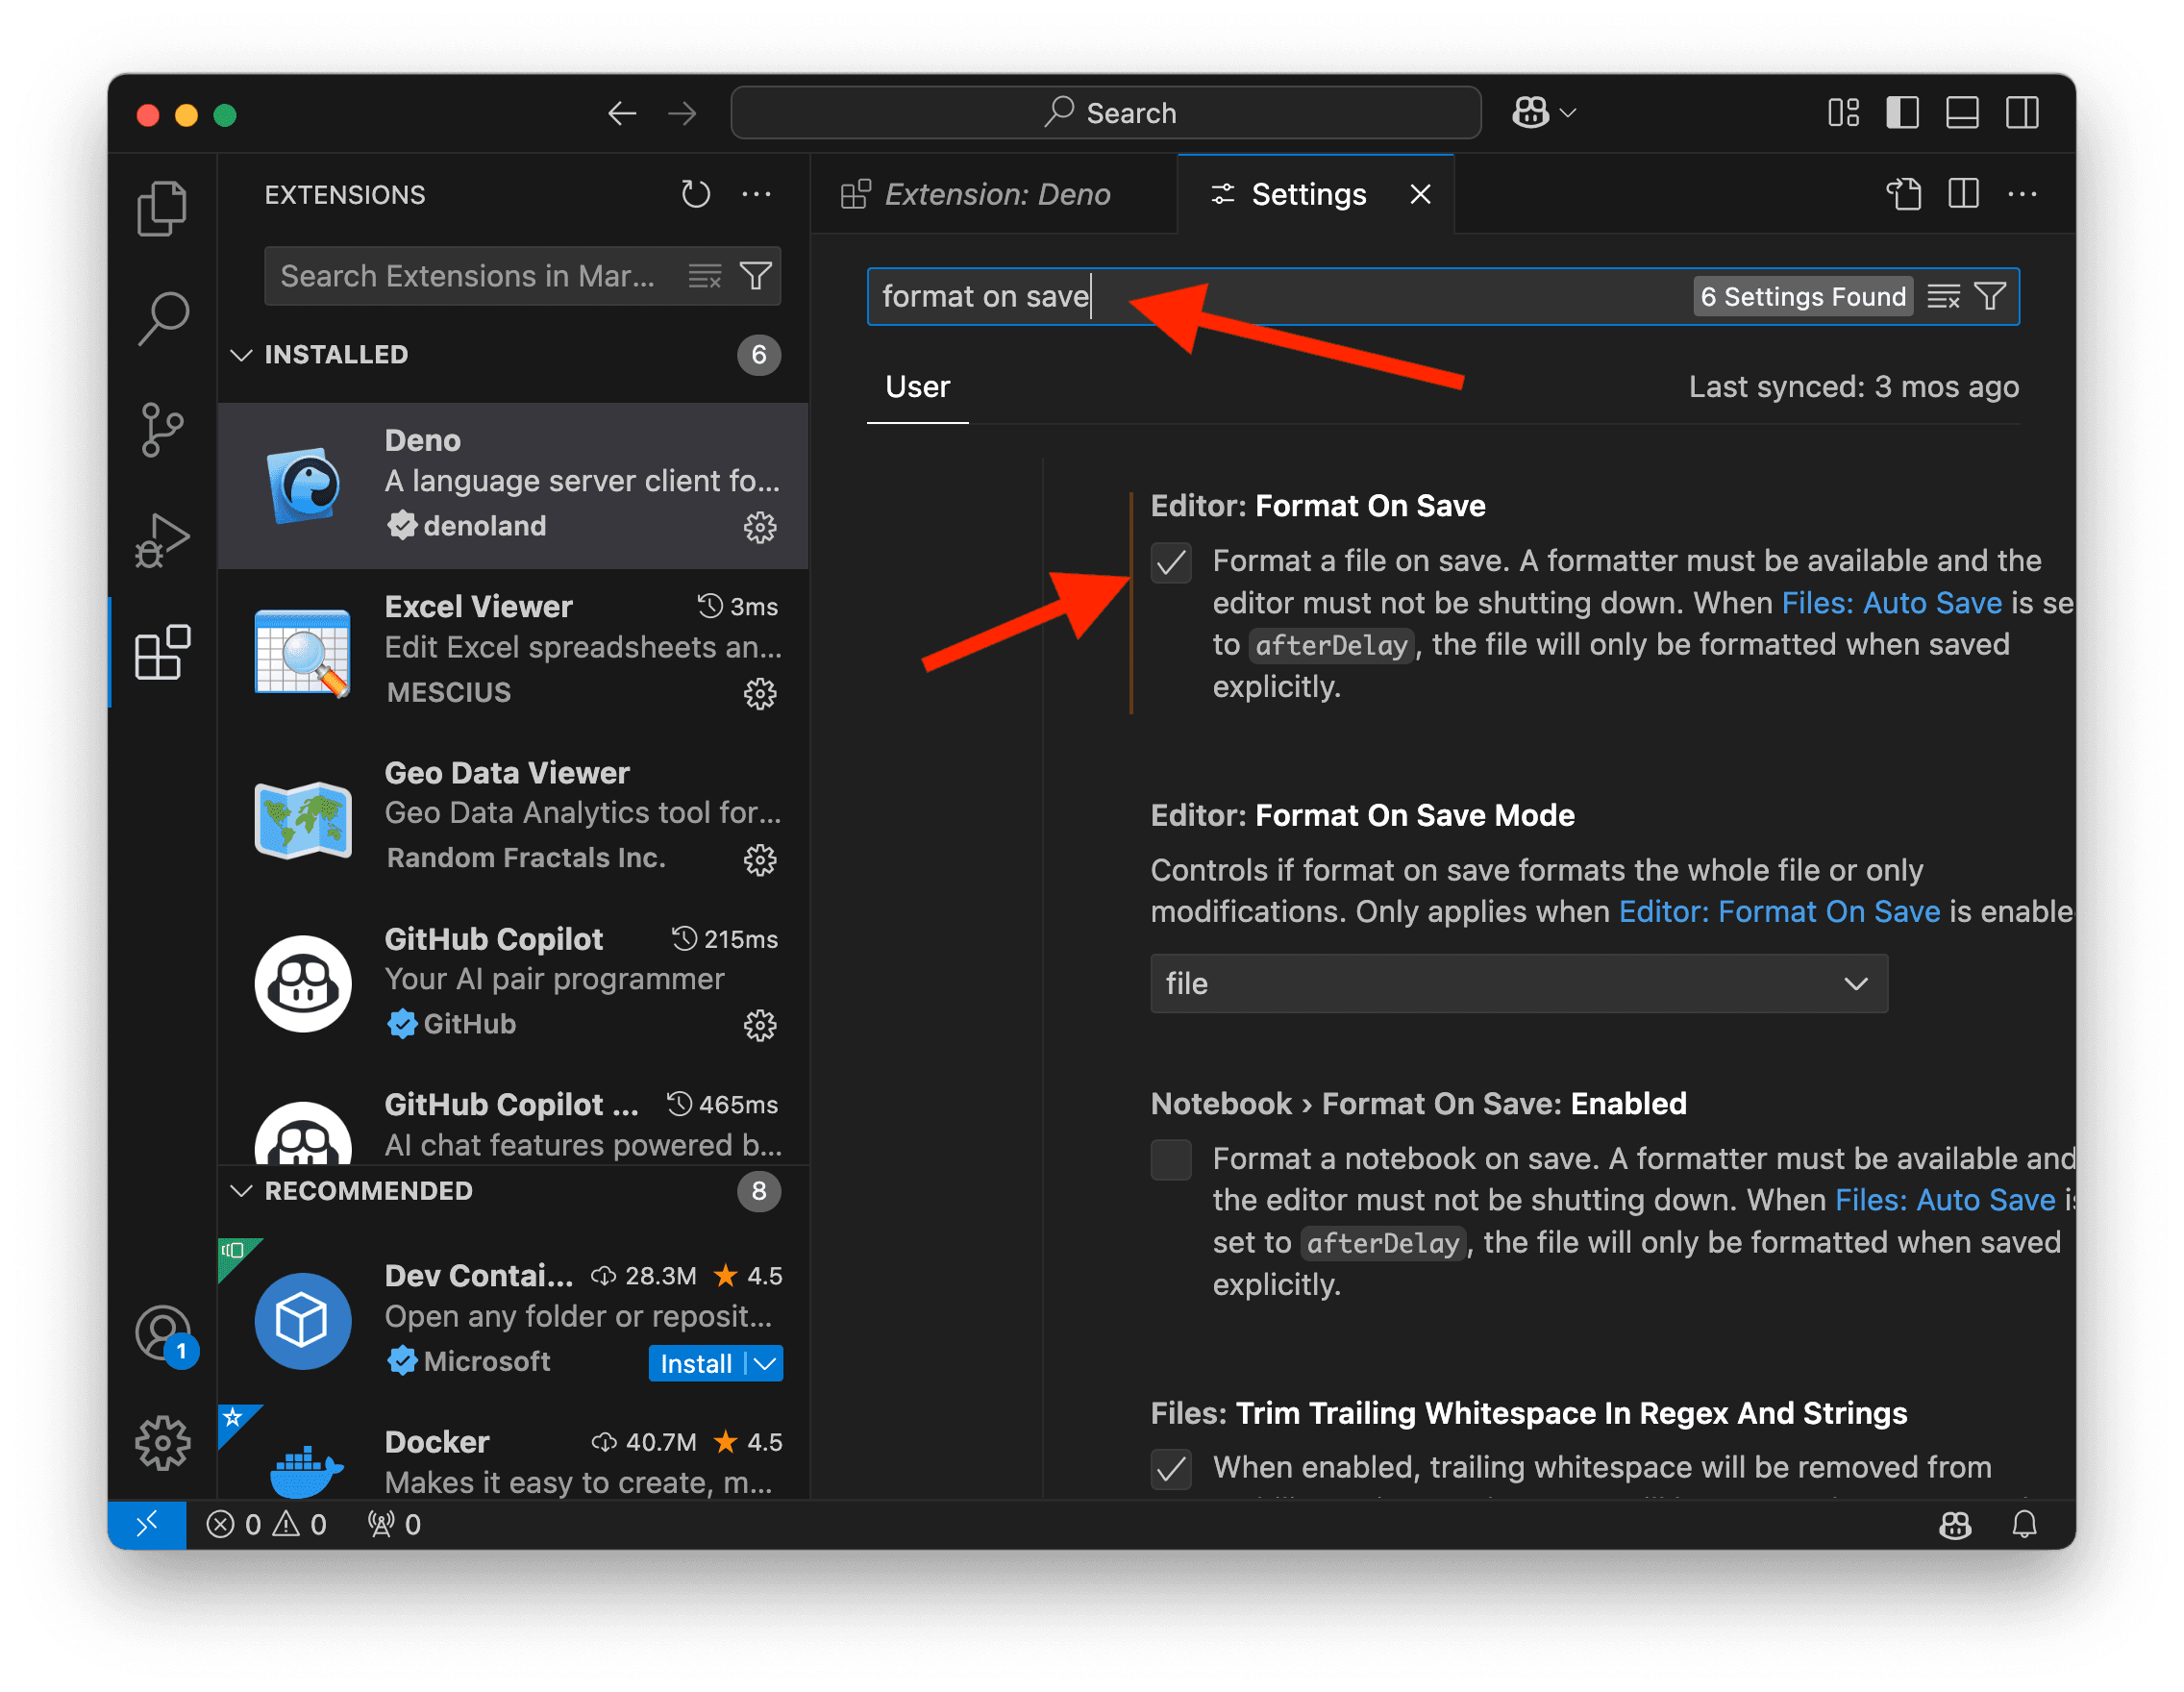
The settings are saved automatically, so you can now close the Settings tab. You’re all set!
Let’s run a script
To double-check that everything is working as expected, we are going to write a little script and run it.
To start a new project in VS Code, follow these steps:
- Create a new folder somewhere handy on your computer.
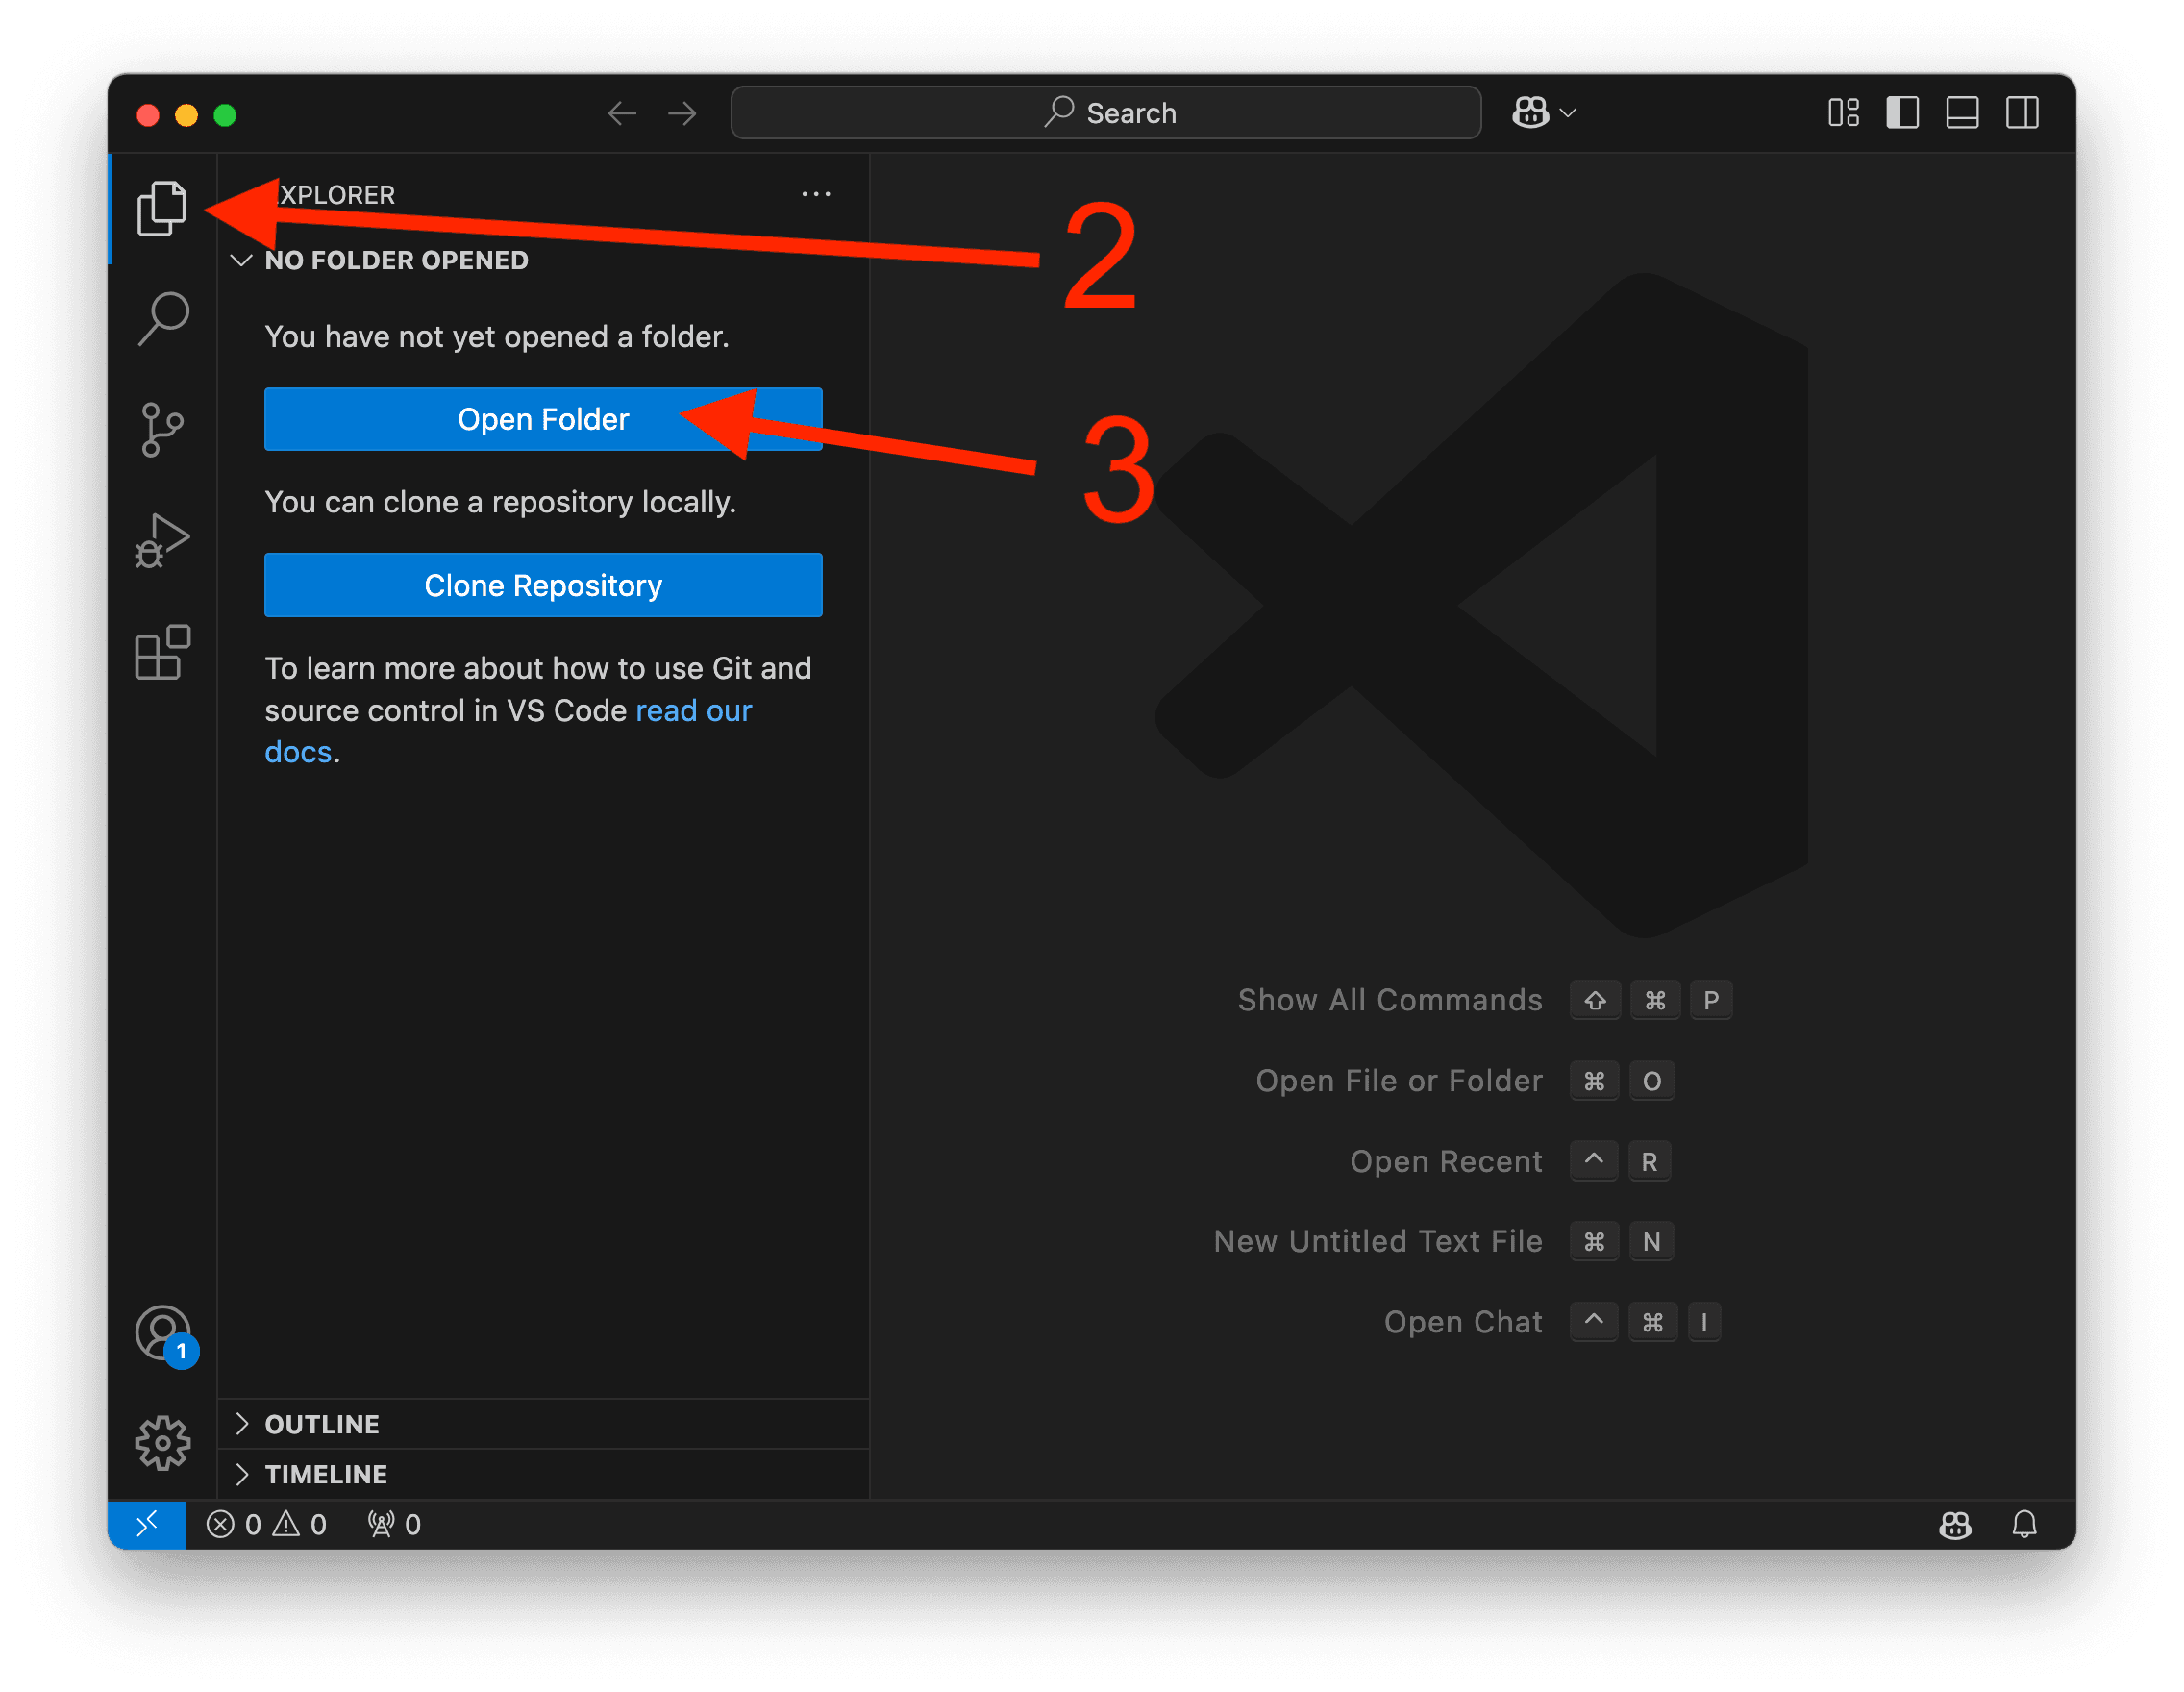
- In VS Code, click on the Explorer tab.
- Click on
Open Folderand select the folder you just created. If you are asked whether you trust the authors of the files, say “Yes” to proceed.
Now that VS Code has opened your folder, we can create a new file.
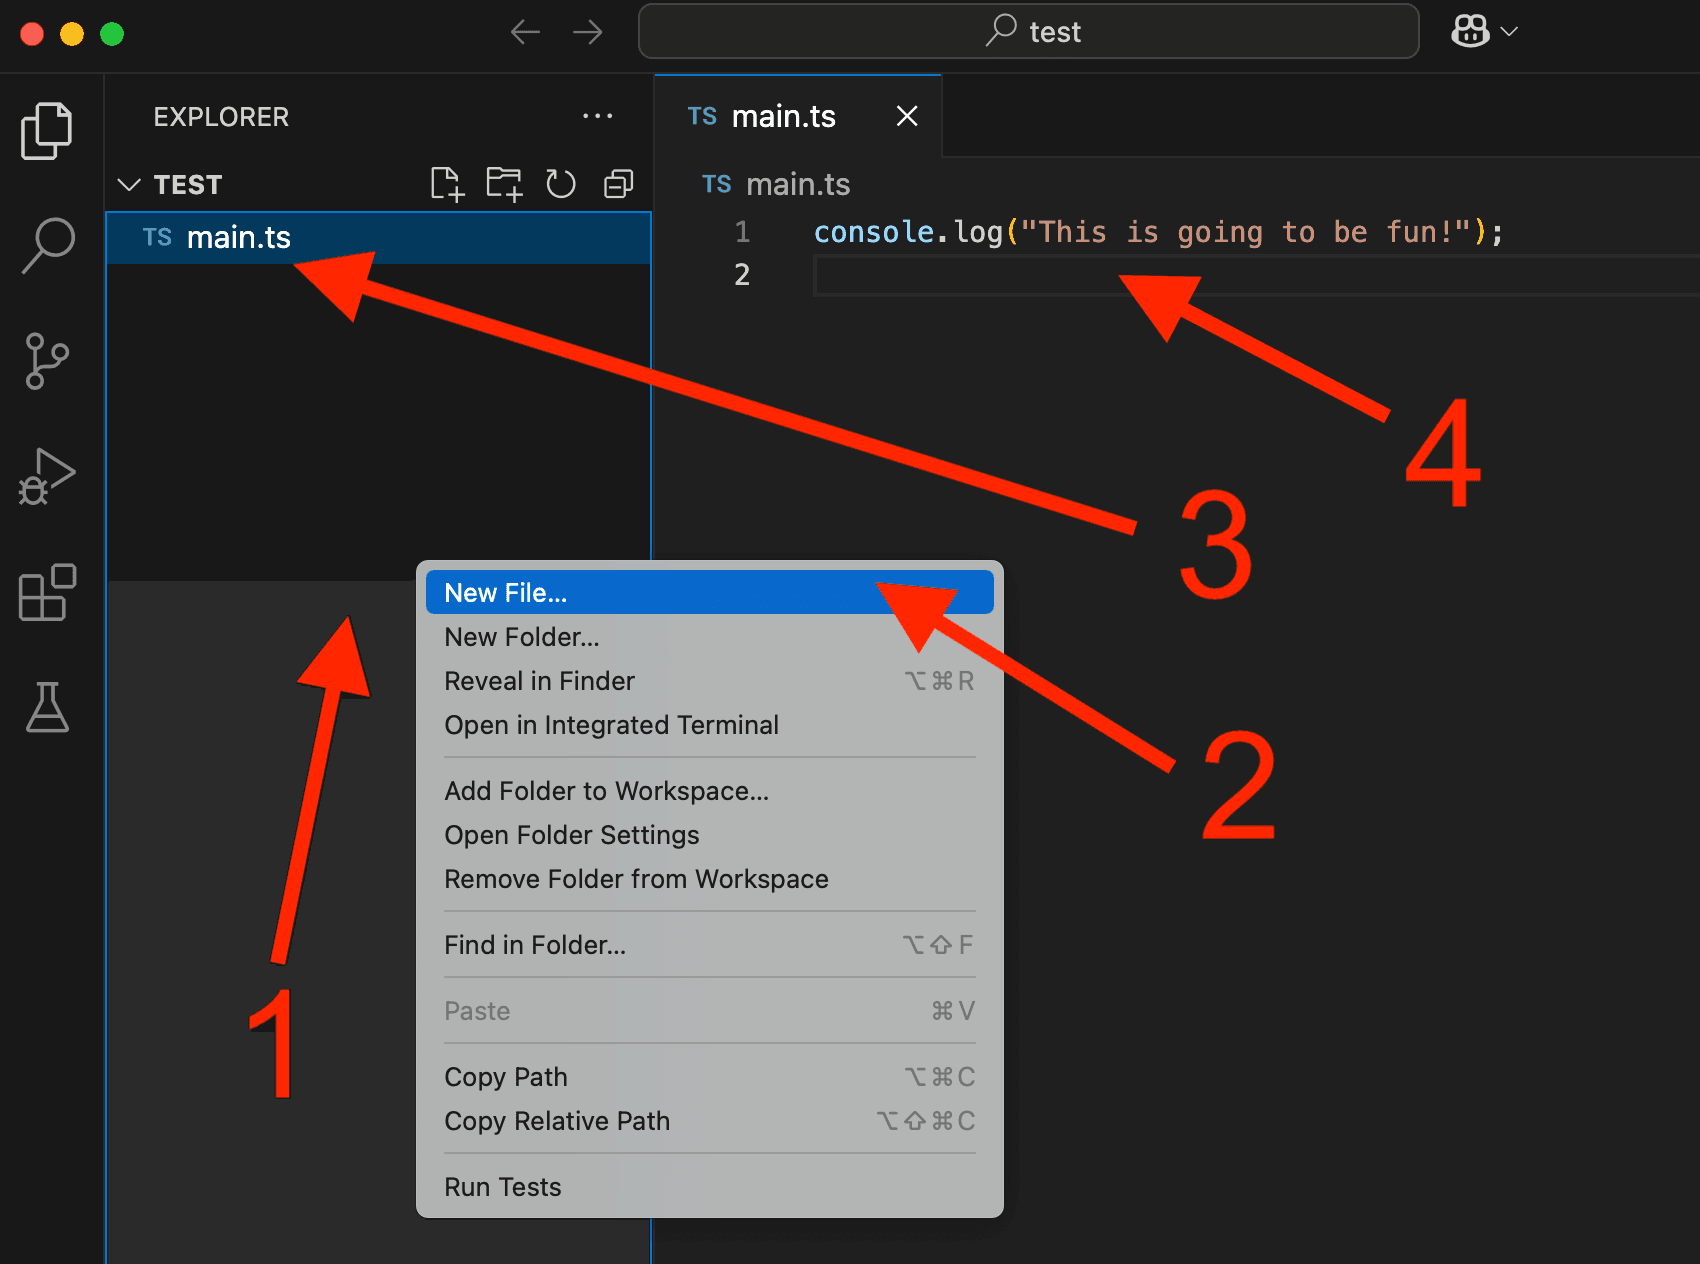
- Right-click on the Explorer.
- Click on
New file.... - Name your new file
main.ts. If the file doesn’t open as a new tab, click on it. - In the
main.tstab, typeconsole.log("This is going to be fun!");and save the file by pressingCMD+Son Mac orCTRL+Son PC.
This code tells your computer to log This is going to be fun! in your terminal.
If you see a white dot instead of a cross on the tab label (as shown in the screenshot below), it means you modified the file but haven’t saved it. Make sure to save the file by clicking in it and then pressing CMD + S on Mac or CTRL + S on PC.
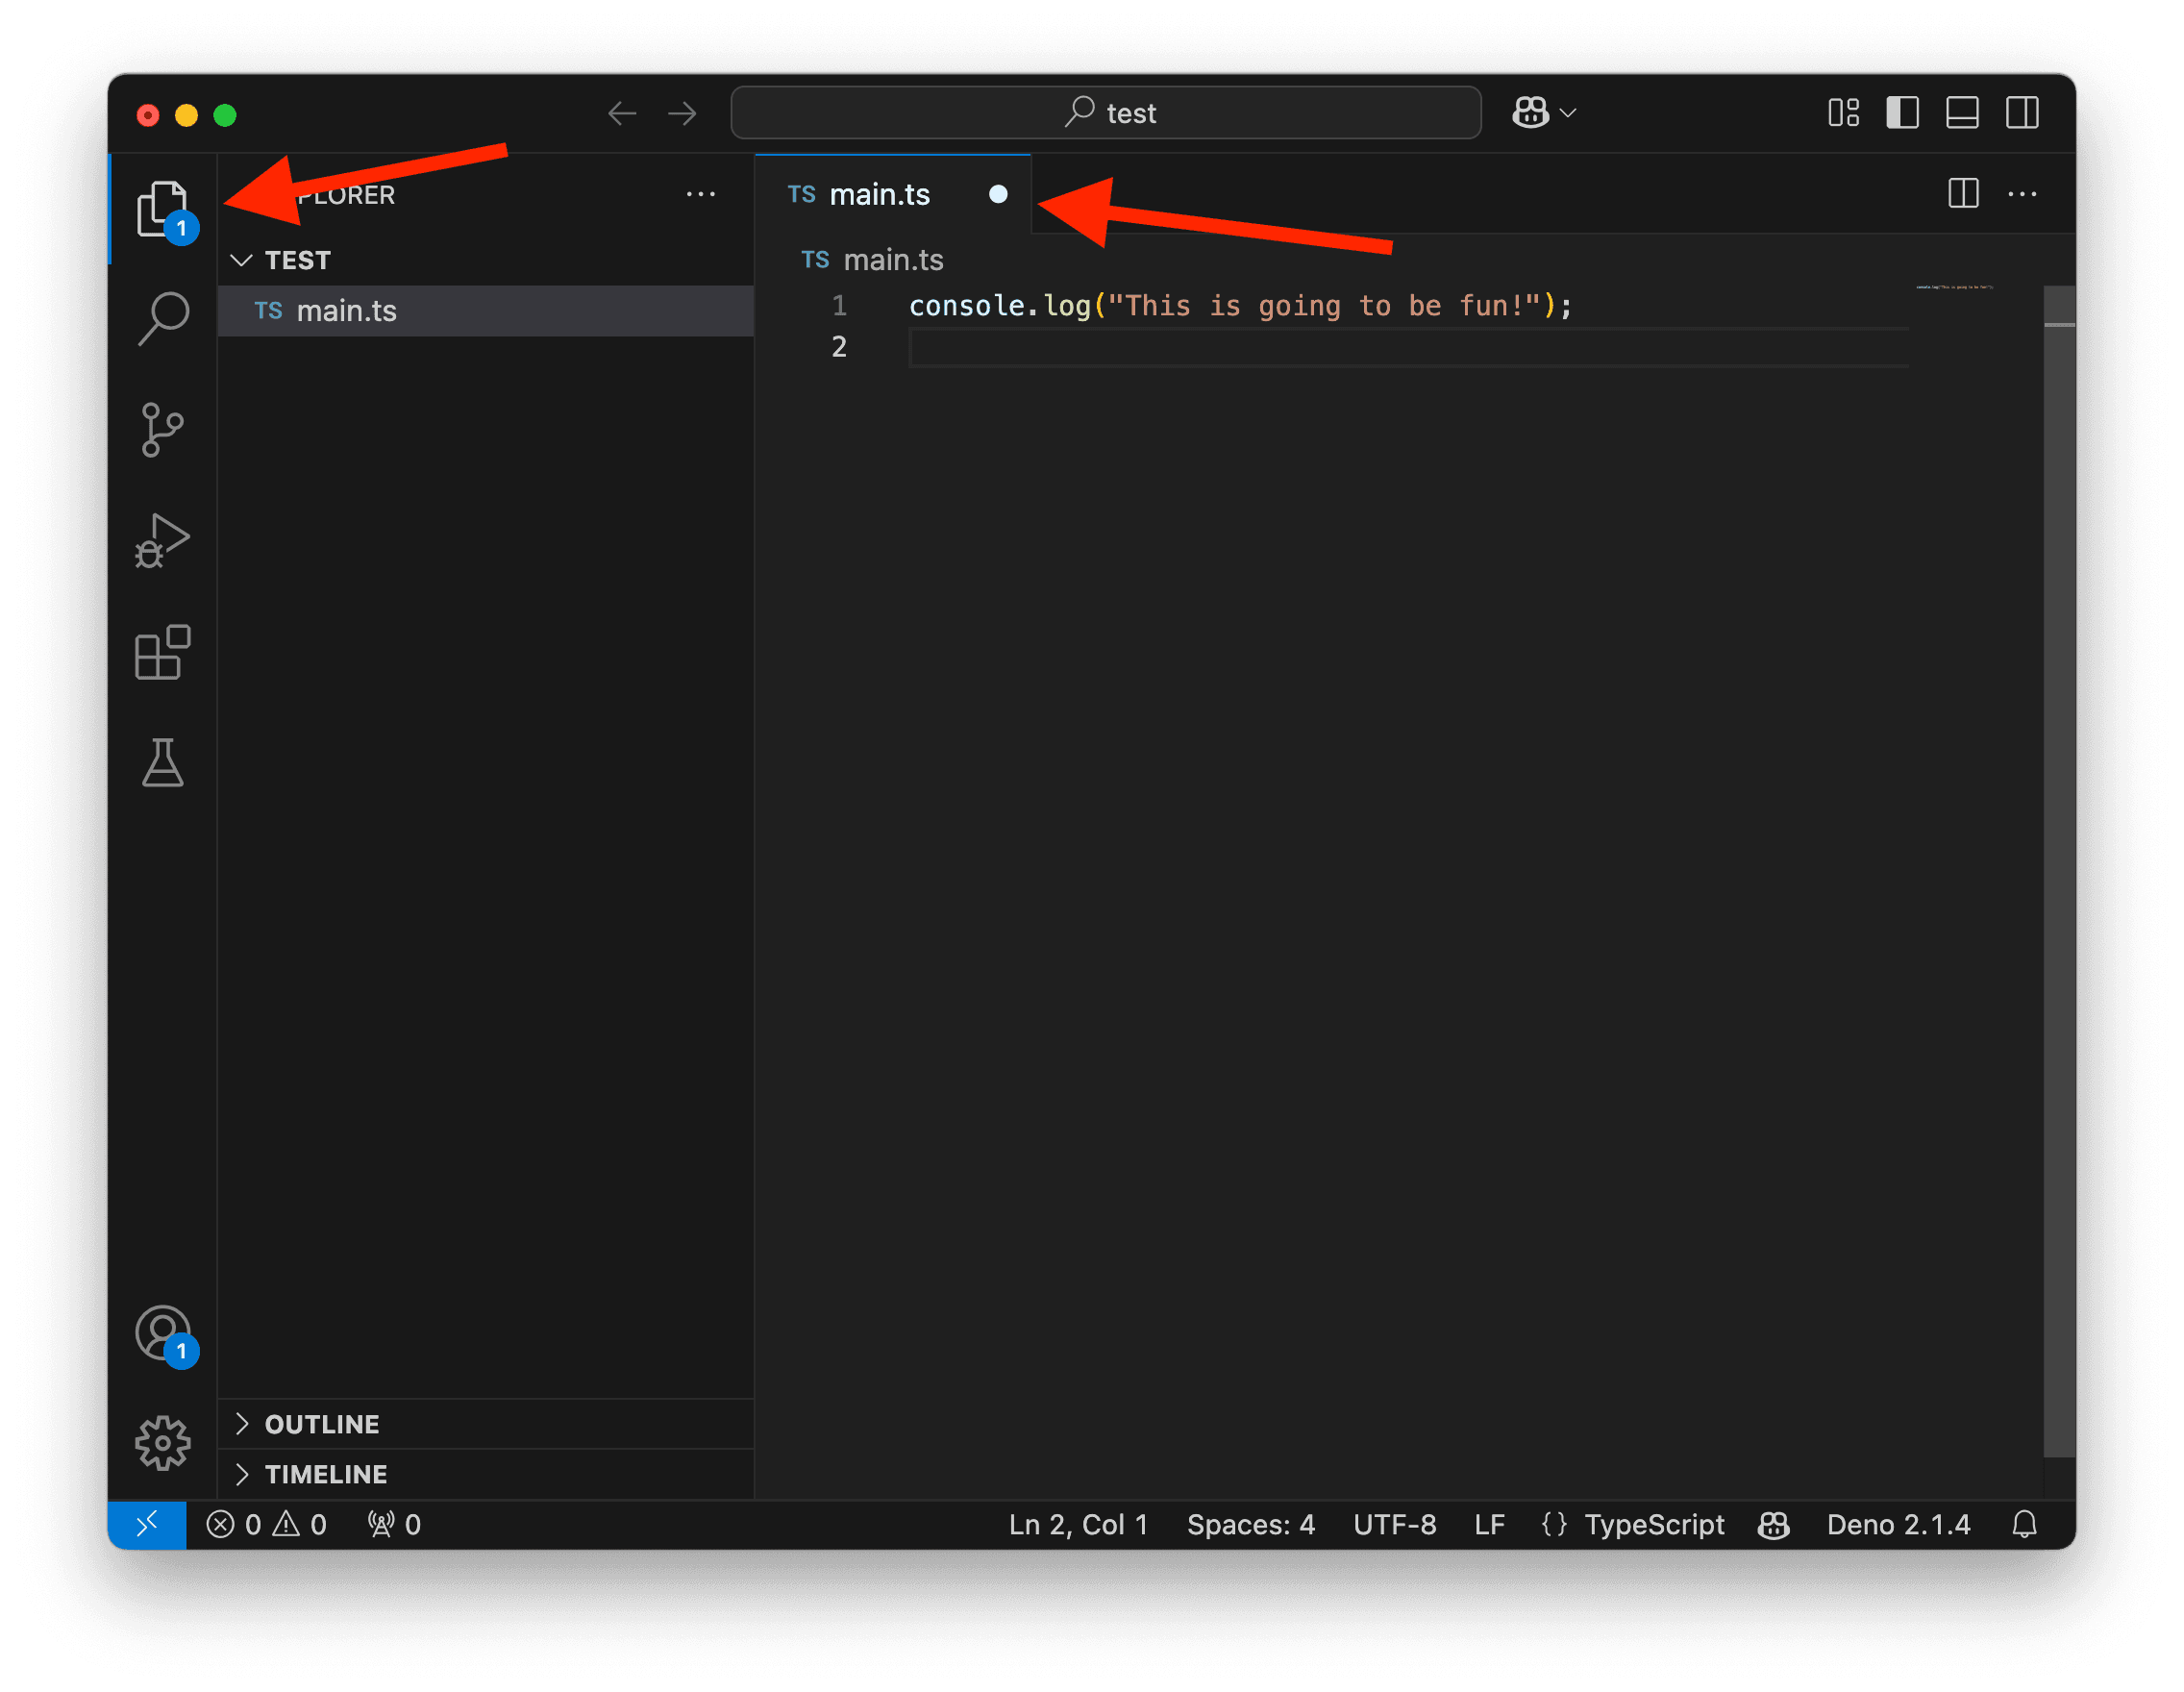
Once the file is saved, we can run the script.
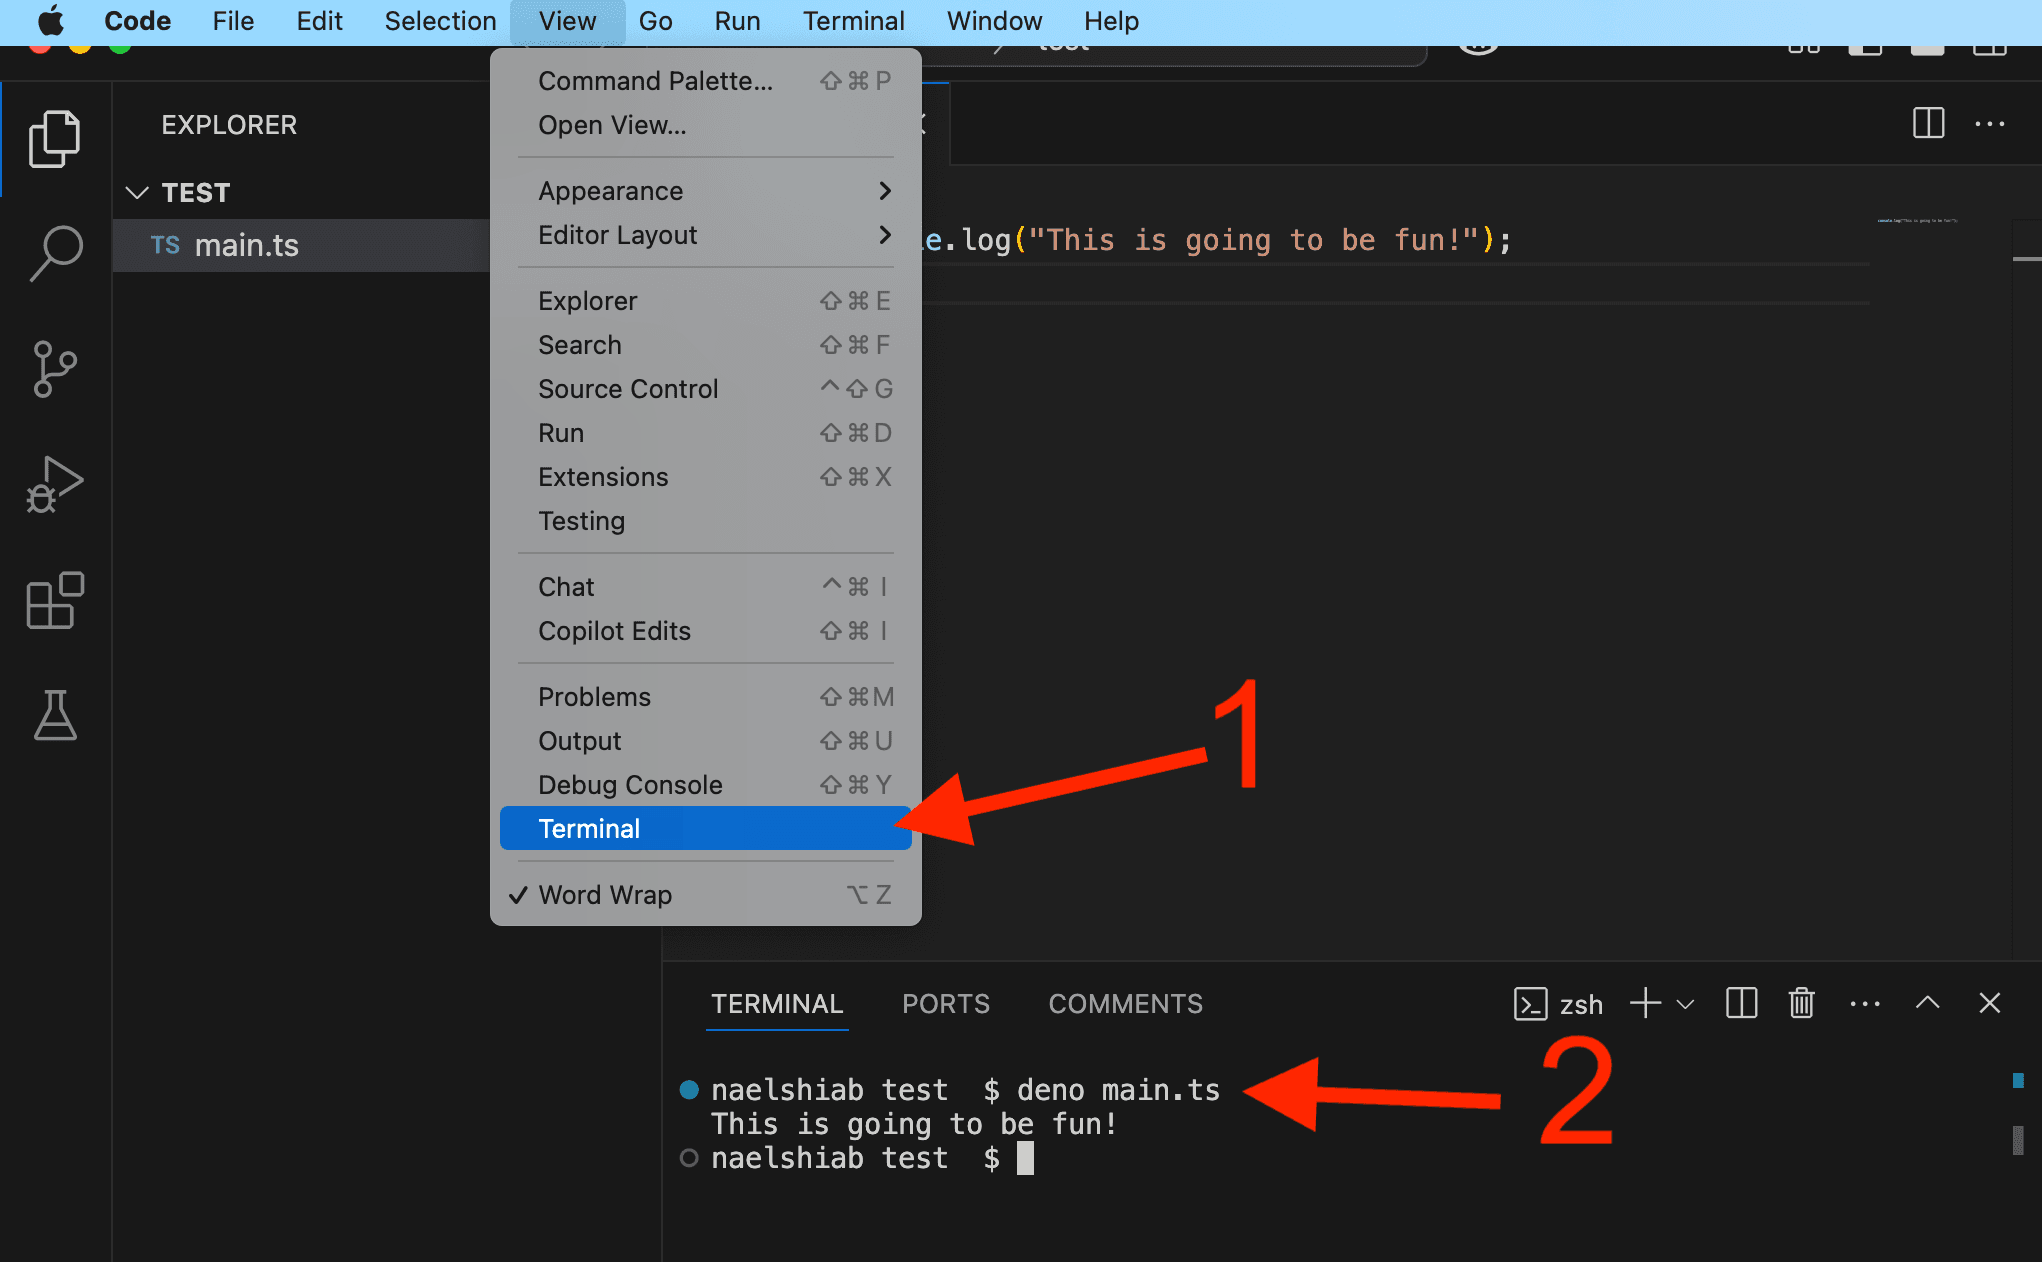
- Toggle the terminal.
- Type
deno run main.tsin the terminal and press enter.
This asks your computer to use Deno to run the script main.ts. As a result, you should see This is going to be fun! in your terminal.
Congratulations! You are now ready to write amazing code. 🤩
About AI
You may have noticed that we haven’t installed any AI-powered tools, such as GitHub Copilot.
These tools are increasingly popular for coding tasks and can significantly boost productivity. However, they are not without flaws. They can introduce errors and bugs.
For experienced coders, this isn’t a big issue. When you know what you’re doing, you can easily review and refine the AI’s output.
For beginners, though, it’s better to hold off. Master the basics first, and once you have a solid foundation, you’ll be in a much better position to benefit from these tools.